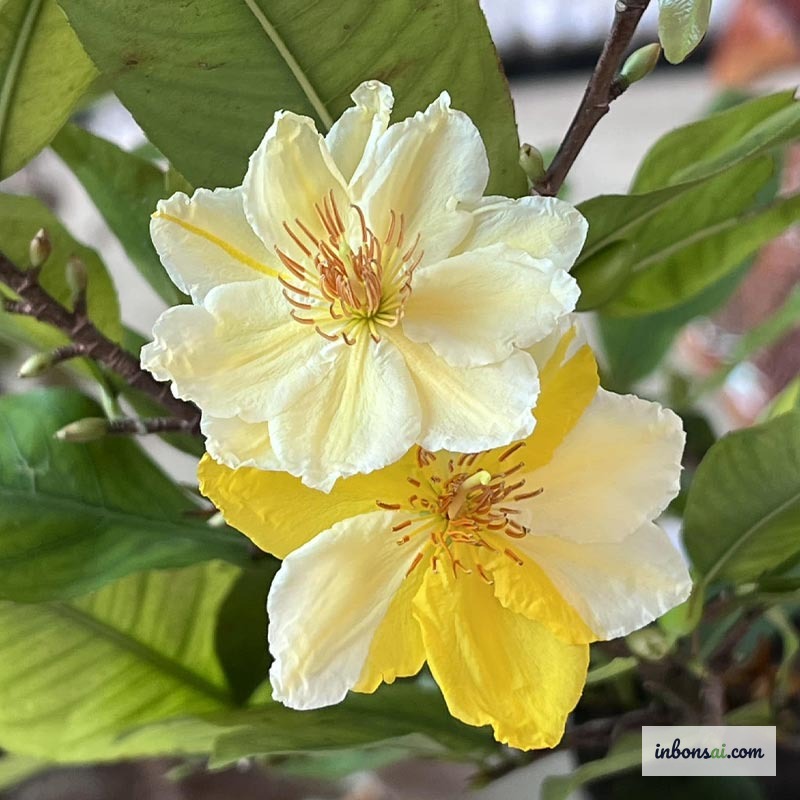
A single mai vang tree blooming in multiple colors — bright yellow, pure white, soft pink — on the same trunk is the dream of many bonsai enthusiasts. This is not magic, but the result of the grafting technique for multiple-color mai vang applied correctly. If you already know the basics of mai vang care and want to elevate your tree's aesthetic value, this guide will walk you through every step from preparation to post-graft care.
Why Graft Multiple Colors of Mai Vang onto One Tree?
Grafting multiple colors of mai vang (Ochna integerrima) onto one tree creates not only a unique aesthetic but also offers several practical benefits for bonsai enthusiasts.
First, a mai vang tree that blooms in several colors simultaneously becomes a stunning focal point in any display space — especially during the Lunar New Year. Instead of growing separate trees in different colors and consuming valuable garden space, you can use one healthy rootstock and graft multiple varieties onto it.
In addition, grafting is the fastest way to propagate rare mai vang varieties like white jade mai, orange mai, and pink mai without waiting for seedlings to mature — a process that can take 3–5 years. This technique also lets you "rescue" an old mai stump with beautiful roots but unattractive flowers by grafting superior varieties onto it.
Importantly, grafting mai vang is not overly complex if you prepare carefully and act at the right time. Success rates can reach 70–90% for beginners when following the process correctly.
Best Time to Graft Mai Vang
Choosing the right time to graft is a key factor in success. Mai vang grafts best in two windows each year:
Spring (February–April): This is the most ideal time. After the New Year, the tree pushes strong new growth and sap flows abundantly. The cambium layer is extremely active, helping graft unions heal quickly and scions root within 3–4 weeks.
Rainy season (May–June): The second window applies well in southern Vietnam. High humidity during the rainy season prevents graft wounds from drying out, while cooler temperatures reduce stress on scions.
Avoid grafting during the dry summer heat (July–August) or when the tree is flowering, as the plant is channeling nutrients into blooms rather than feeding a new graft. Do not graft on heavy rain days since rainwater can penetrate the graft wound and cause rot.
Preparing Tools and Materials for Grafting
Good tools are the foundation of a successful graft. Before starting, gather the following:
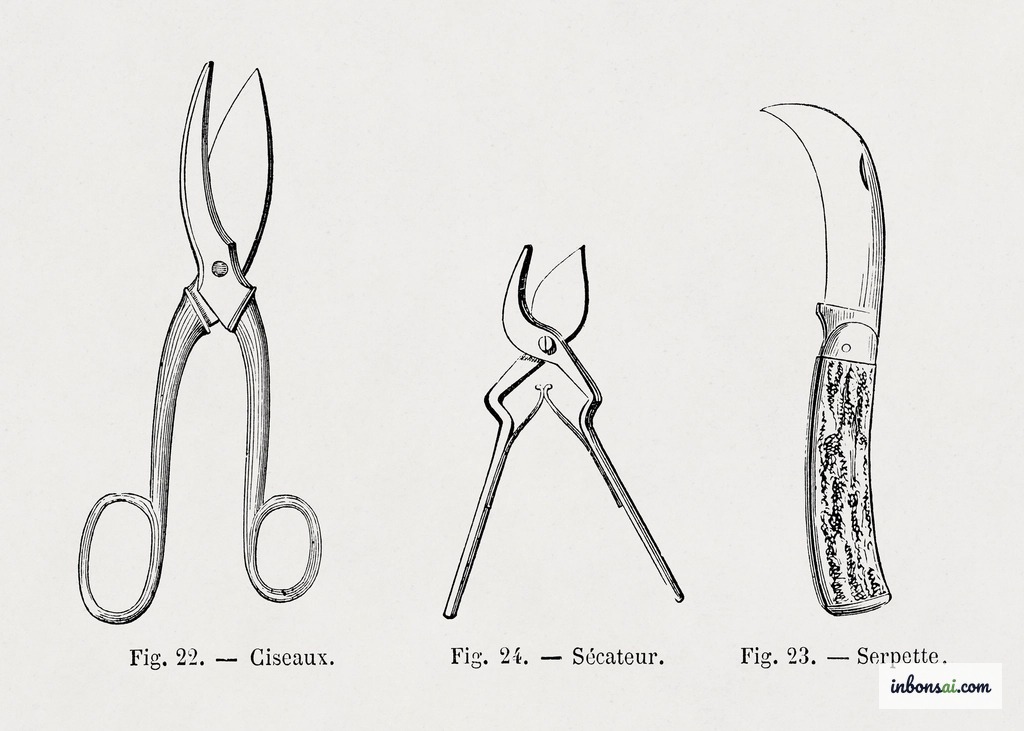
Cutting tools:
- A sharp, dedicated grafting knife (never use a rusted or ordinary knife)
- Sharp pruning shears to cut scions cleanly without crushing
- A whetstone to keep the blade sharp throughout the process
Binding and protection materials:
- Specialized grafting tape or thin plastic strips
- Small plastic bags or cut plastic bottles to create humidity covers
- 70% isopropyl alcohol to sterilize tools before grafting — this step is mandatory, since bacteria from dirty tools can rot the graft union
Scion material:
- Taken from a healthy, disease-free mother tree
- Semi-hardwood cuttings (not too old, not too young), 8–12 cm long with 2–3 dormant buds
- Harvest scions in the early morning when the tree is fully hydrated
Therefore, don't scrimp on a quality grafting knife — a sharp blade creates a flat cut that maximizes cambium contact.
Selecting Rootstock and Scion
Choosing the right rootstock and scion directly affects graft survival and flower quality.
Rootstock criteria:
The ideal rootstock is a healthy five-petal yellow mai vang with a trunk diameter of 1–3 cm (for bud grafting) or 2–5 cm (for branch grafting). The tree should have a strong root system, be in active growth, and have fresh green bark. Avoid trees that are diseased, growing in compacted soil, or stressed from water or fertilizer issues.
If you want to graft multiple colors onto one tree, choose a rootstock with branches spreading in multiple directions — each branch will be a graft point for a different flower color.
Scion criteria:
Scions must come from a mother tree that reliably produces beautiful flowers of the desired variety. Choose semi-hardwood cuttings — neither fully lignified (brown and hard) nor too young (bright green and soft). Ideal scions are light brownish-green with mature leaves. Each scion segment should have 2–3 dormant buds to maximize sprouting chances.
You can read more about mai propagation methods for deeper context on preparing rootstocks from seed.
Common Mai Vang Grafting Methods
Three grafting methods are most commonly used when grafting multiple colors onto one mai vang tree, each suited to different conditions and experience levels.
1. Bud grafting (shield budding): The most popular and easiest method. A single bud from the mother tree is inserted into the rootstock through a T-cut in the bark. Advantages: minimal scion material required, high success rate (80–90%), and a compact graft union. Best for branches with a diameter of 0.5–2 cm.
2. Cleft grafting (wedge grafting): The top of the rootstock branch is cut off and split, then a wedge-shaped scion is inserted into the cleft. Used when the rootstock branch is larger in diameter than the scion. Success rates are fairly high (70–85%) and the grafted scion grows vigorously once established.
3. Approach grafting: A branch from two separate trees is trimmed flat, pressed together, and bound until the cambium layers fuse. This takes more time but yields a very high success rate (85–95%), especially for rare mai varieties that are difficult to graft by other methods.
You may also find useful techniques in our bonsai grafting guide for beginners.
Step-by-Step Grafting Technique
Here is a detailed walkthrough for bud grafting — the method recommended for beginners.
Step 1: Sterilize tools Wipe the blade clean with 70% alcohol and let it dry. This is a mandatory step to prevent bacterial rot at the graft union.
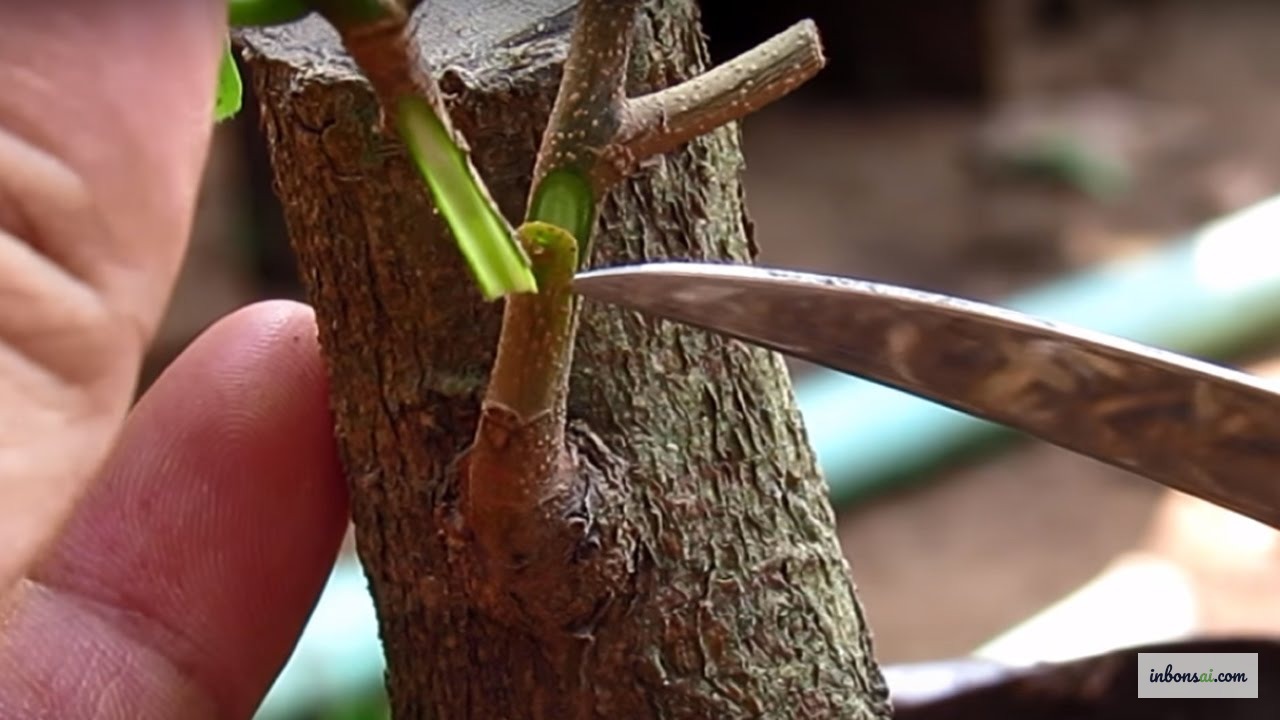
Step 2: Cut the bud from the mother tree Use a sharp knife to cut a single dormant bud along with a thin layer of bark in an oval or shield shape, about 2 cm long. Gently separate the bark from the wood, retaining the thin wood layer behind if it adheres.
Step 3: Make the graft cut on the rootstock On the rootstock branch, make a T-cut or small square cut through the bark — only deep enough to reach the cambium, not into the wood. Gently separate the two bark flaps with the knife handle.
Step 4: Insert the bud Slide the bud shield under the bark flaps of the T-cut so the cambium of the bud contacts the cambium of the rootstock. This is the most critical step — if the two cambium layers don't make contact, the graft will not take.
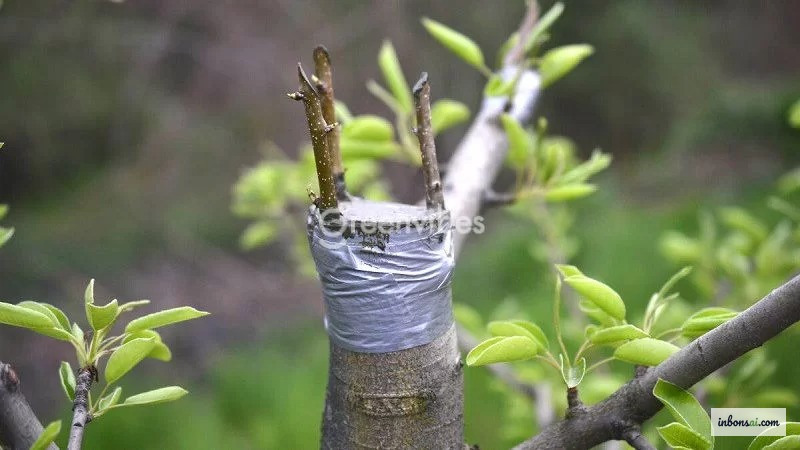
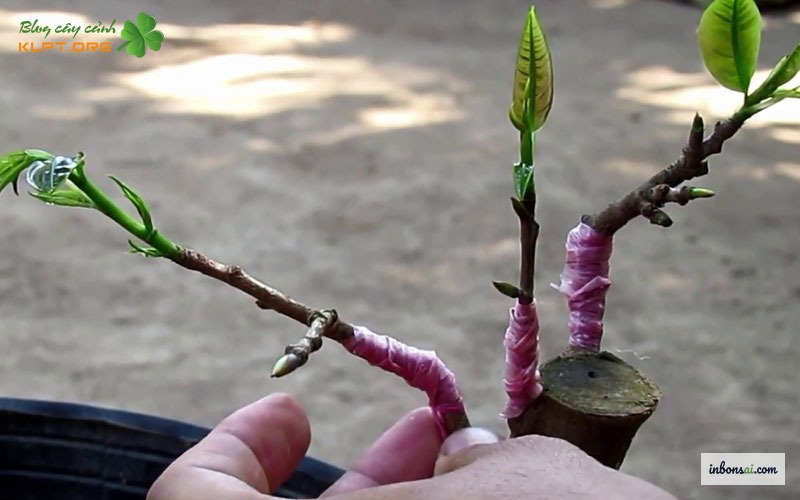
Step 5: Bind the graft Wrap grafting tape or plastic strips tightly from bottom to top, making sure not to cover the bud itself directly. The tape must be snug enough to create pressure but not so tight that it chokes the bark.
Step 6: Cover and protect Use a clear plastic bag or a cut plastic bottle as a humidity dome over the graft site for the first 10–14 days to retain moisture and shield from direct sun and rain.
Caring for Mai Vang After Grafting
The post-graft period determines whether the scion will survive and thrive. Proper care during the first 4–6 weeks is critical.
Watering: Water gently in the early morning, avoiding direct water on the graft site. Keep soil moist but not waterlogged. In hot sunny weather, provide 50–70% shade for the tree.
Monitoring the graft: After 10–14 days, inspect the graft. If the bud remains green or begins to swell, the graft has taken. If the bud shrivels and turns dark brown, the graft failed — you will need to re-graft at a different location.
Removing the tape: When the grafted bud has sprouted and the shoot is 3–5 cm long, carefully remove the grafting tape. Leaving it too long can cause the tape to constrict the trunk and leave permanent scars.
Pinching the rootstock top: Once the graft is well-established (4–6 weeks), cut off the portion of the rootstock branch above the graft to direct all nutrients to the new scion.
Fertilizing: Begin light fertilization (NPK 20-20-20 or diluted organic fertilizer) after 3–4 weeks when the scion is actively growing. Avoid fertilizing in the first 2–3 weeks.
Once the tree has recovered and the grafted scion is growing steadily, see our guide on mai vang care after Tet for maintaining overall tree health.
Common Grafting Mistakes and How to Fix Them
Even with careful preparation, some common problems can occur. Understanding the causes helps you correct them and improve future success rates:
Graft does not take (bud shrivels and dies): Most commonly caused by incomplete cambium contact, contamination from unsterilized tools, or grafting when the tree is not actively growing. Fix by re-grafting at a different spot with a freshly sharpened, sterilized knife.
Scion leafs out but stops growing: Usually due to insufficient water or light, or grafting tape that is too tight and cutting off the scion. Remove the tape sooner and adjust watering.
Rootstock pushes vigorous shoots that overwhelm the scion: This is a normal response — the rootstock is competing for nutrients. Remove all rootstock shoots immediately as they appear to direct all energy to the grafted scion.
Mold or rot at the graft union: Caused by rain or excessive humidity entering the graft wound. Trim away the rotted tissue, apply a fungicide, and improve rain protection.
Patience is the most important ingredient. Even experienced growers don't achieve 100% success on every graft. Each failure is a lesson that fine-tunes your technique for the next attempt.
Choosing Color Combinations for a Multi-Color Mai Vang
To create a truly impressive multi-color grafted mai tree, plan your color scheme from the start.
Popular combinations among growers:
- Yellow + white: Elegant contrast, ideal for refined display spaces
- Yellow + pink + white: Three-color richness — balance branch placement so the display doesn't look cluttered
- Yellow + orange: Warm, vibrant tones that evoke the festive energy of Lunar New Year
When deciding graft positions on the tree, distribute branches in different directions so the eventual canopy is balanced and visually pleasing. Avoid grafting multiple colors too close together — when flowers open simultaneously, overcrowding can look chaotic rather than beautiful.
With patience and proper technique, within one or two flowering seasons you will have a unique multi-color mai vang — a living work of art that any bonsai enthusiast would be proud to display.
Tags
#mai-vang#grafting-technique#multi-color-flowers#bonsai-maiGet bonsai guidance every week.
Fresh care guides, styling notes, and bonsai inspiration delivered to your inbox.
