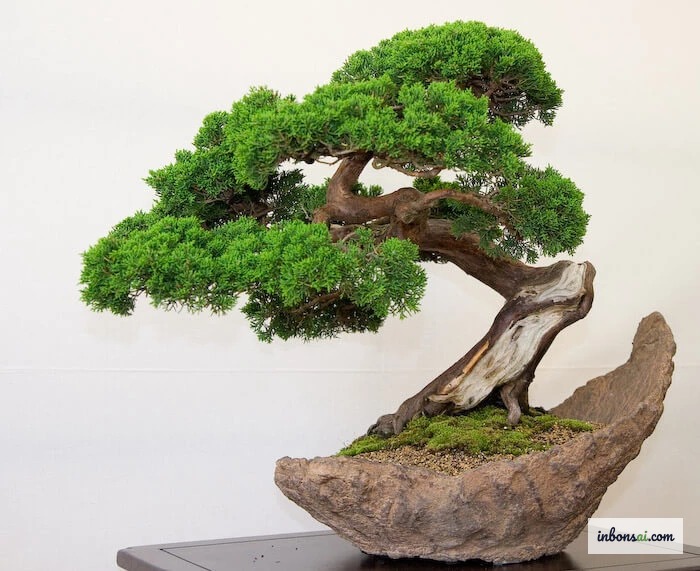
The tanuki bonsai technique is one of the most unique and creative shaping methods in modern bonsai art. By securing a living tree into a dry driftwood host, artists can create pieces that appear centuries old in just a few years. The tanuki bonsai technique is fully legitimate within the Japanese bonsai community and is growing in popularity worldwide.
What Is Tanuki Bonsai? Origins and Artistic Significance
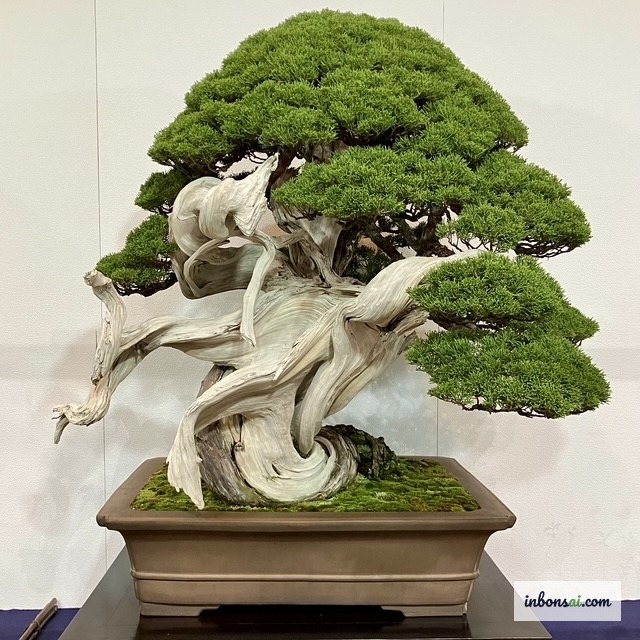
Tanuki (狸) means "raccoon dog" in Japanese — an animal regarded as a symbol of transformation and illusion in Japanese culture. The tanuki bonsai technique lives up to that name: it creates the illusion of a genuinely ancient bonsai by combining driftwood (dead, dried wood) with a living tree that is bent and secured into the wood.
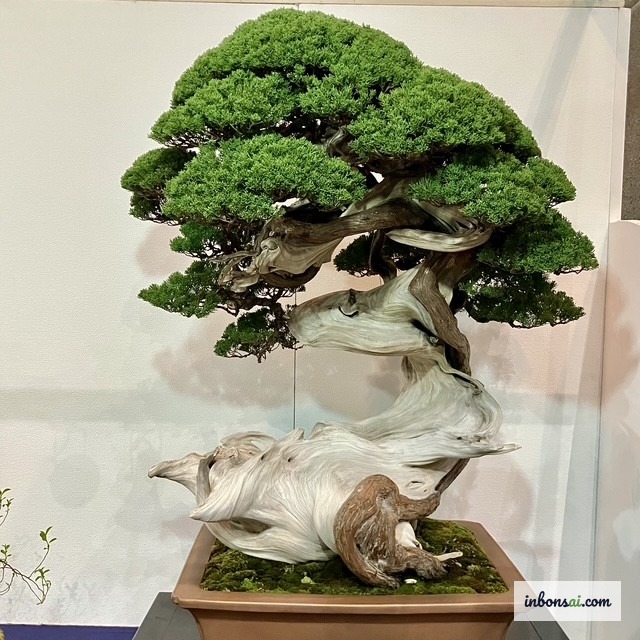
The technique was developed in Japan in the mid-twentieth century, when bonsai artists sought to replicate the beauty of century-old cliff-side junipers without waiting generations. At its core, tanuki bonsai is not "fakery" but a recognized art form, accepted at many international bonsai exhibitions.
The key difference from conventional bonsai aging techniques is that tanuki uses real driftwood (sourced from forests or shops), whereas jin and shari only create dead wood on an already-living tree. See also bonsai aging technique — creating aged bark and deadwood to understand the differences and how to combine both approaches.
The tanuki bonsai technique is attracting growing interest among enthusiasts worldwide because it allows the creation of aesthetically compelling pieces in far less time than growing a tree from scratch.
Choosing the Right Driftwood for Tanuki Bonsai
Driftwood is the backbone of any tanuki composition — selecting the right piece accounts for 50% of the technique's success. There are three main sources:
Wild forest driftwood: The best aesthetic choice. Dense hardwoods such as rosewood, sandalwood, or ironwood that have partially decayed develop beautiful grain patterns and last for decades. Thoroughly clean to remove mold and insects before use.
Aquarium driftwood from pet shops: Wood sold for fish tanks (typically mangrove or petrified wood) is ideal for tanuki because it is already treated, clean, and comes in many interesting shapes. Prices range from the equivalent of a few to twenty US dollars per kilogram.
Jin/shari off-cuts: If you have a bonsai with large dead-wood sections (jin, shari), you can separate that material and use it as a tanuki host.
Ideal driftwood criteria:
- Height proportional to the intended living tree (1:1 to 2:1 ratio)
- Natural shape: curved, twisted, or with natural hollows
- Completely dry — no internal moisture or mold
- Diameter large enough to carve a channel for the living tree's trunk
Before use, treat the driftwood by soaking it in diluted sulfur (lime sulfur) solution for 30 minutes, then dry completely in full sun for at least two days. This preserves the wood and prevents future mold.
Selecting the Living Tree to Attach
Not every species suits the tanuki bonsai technique. The ideal tree needs special qualities to thrive in these unusual growing conditions:
Best species choices:
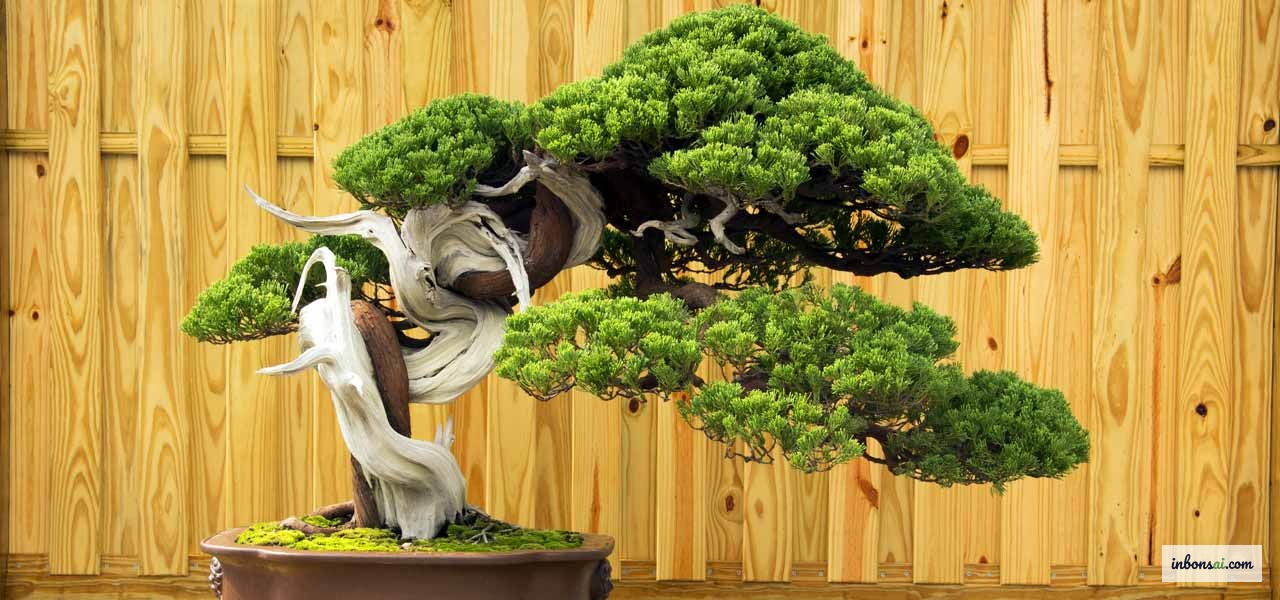
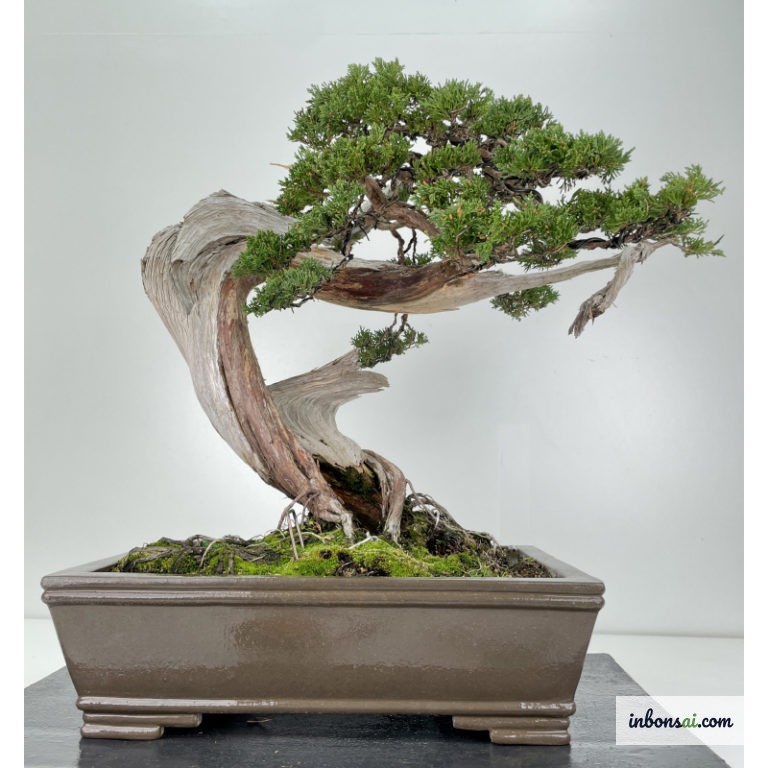
- Juniper: The traditional and most popular choice in Japan. Juniper roots readily into driftwood, tolerates dry conditions, and develops naturally authentic-looking aged bark.
- Podocarpus (Buddhist pine): Widely used in tropical climates, slow-growing, small leaves that convey an ancient feel.
- Fukien tea (Carmona): Small leaves, white flowers, pliable trunk — excellent for beginners attempting tanuki.
- Ficus (banyan, strangling fig): Extremely easy to root, fast-growing; can develop aerial roots that embrace the driftwood for a dramatic effect.
Selection criteria:
- Slender, flexible trunk that can be bent to follow the driftwood's channel without snapping
- Healthy, compact root system (not oversized, not rotted)
- Young tree (1–3 years old) adapts faster and bends more easily
- No signs of pests or disease
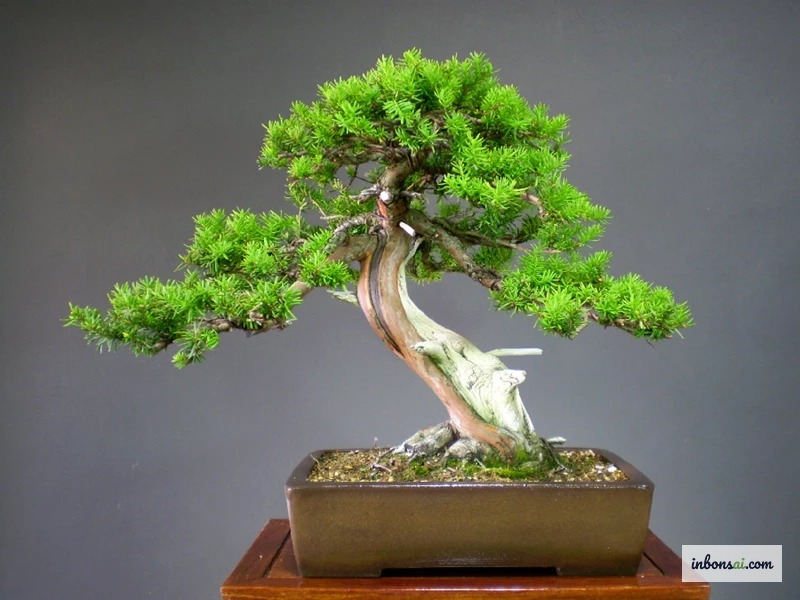
The tree's trunk should be roughly 20–30% smaller in diameter than the driftwood, so the wood remains the dominant visual element after attachment. A common mistake is choosing a tree too large for the host, which destroys the ancient, weathered illusion.
How to Make a Tanuki Bonsai — Step-by-Step
This is the core of the tanuki bonsai technique. Prepare all tools before you start to avoid interruptions.
Tools needed:
- Power drill with wood bits (10–20 mm diameter)
- Wood chisel and mallet
- Steel or copper wire (2–3 mm diameter)
- Adhesive (epoxy or neutral silicone)
- Bonsai soil and a suitable pot
- Bonsai pruning scissors
Step 1: Prepare the driftwood Place the driftwood on your work surface. Identify the best viewing angle (the front face). Use a marker to draw the channel line running from the base to the crown — the line should follow a natural, slightly curved path along the grain, not a straight line.
Step 2: Carve the channel Drill a series of overlapping holes along the marked line, then connect them with the chisel to form a continuous groove. The channel width should be just enough for the living trunk to fit (typically 10–15 mm). The tanuki bonsai technique demands patience here — work slowly, never carve so deep that the wood cracks.
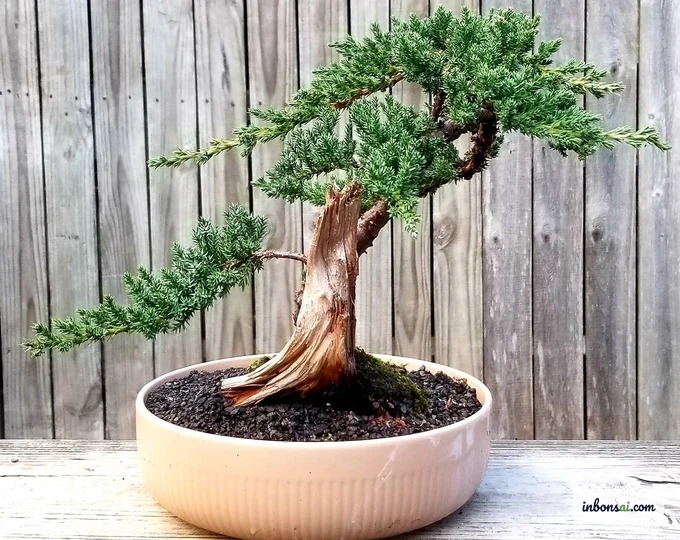
Step 3: Place the tree in the channel Remove the living tree from its pot and gently shake excess soil from the roots. Insert the base of the trunk into the bottom of the channel, bend the trunk to follow the groove's path, and allow the apex to protrude above the driftwood crown. Adjust until the canopy creates a natural, balanced silhouette.
Step 4: Secure the tree Thread steel or copper wire through the driftwood and around the trunk at several points, holding the tree firmly in the channel. Do not over-tighten — the goal is stability without damaging the bark.
Step 5: Plant in a pot Set the entire driftwood-plus-tree assembly into a suitable bonsai pot. Pack bonsai soil firmly around the root system. Bury the driftwood base 2–3 cm deep for stability. See also best bonsai pruning scissors guide to equip yourself for the branch-shaping work ahead.
Wiring and Shaping After Attachment
Once the tree sits in its driftwood channel, the wiring and positioning phase determines the final beauty of the tanuki bonsai composition. Do not rush to shape everything in one session — spread the work across multiple stages so the tree can adapt.
Weeks 1–2 after attachment: Only the initial securing wires are in place. Let the tree stabilize and begin rooting into the new soil. Water regularly, position in moderate light, avoid direct midday sun.
Weeks 3–8: Begin gentle wiring of primary branches with copper wire. The tanuki bonsai wiring principle is identical to conventional bonsai — wrap at a consistent 45° spiral, never bend more than 45° in one pass to avoid snapping.
Wiring the trunk inside the channel: Use copper wire sized at about one-third the trunk's diameter. Anchor one end to the driftwood, then spiral it along the trunk. This distributes bending force evenly and avoids stress concentration that could break the trunk.
After 3–6 months, roots will begin emerging from the channel and gripping the driftwood surface — the clearest sign that the tanuki bonsai technique is working. Once the roots have a firm grip, the initial securing wires can be removed.
Caring for Tanuki Bonsai After Shaping
Tanuki bonsai has specific care requirements compared to conventional bonsai, especially during the first 6–12 months after creation. Understanding these needs helps the tree recover quickly and grow vigorously.
Watering: Because the driftwood absorbs moisture faster than soil, tanuki bonsai typically needs more frequent watering than a conventional bonsai. Check moisture daily — if the top 2 cm of soil is dry, water immediately. Water thoroughly from above so both the driftwood and soil are moistened.
Light: Position the tanuki bonsai where it receives 4–6 hours of natural light per day. Adequate light promotes healthy growth and encourages the roots to grip the driftwood. For the first two months after attachment, shield the tree from harsh midday sun.
Fertilizing: Apply a balanced NPK fertilizer (e.g., 10-10-10) at half the recommended strength for the first three months, then switch to full strength. Apply slow-release organic fertilizer every two months for long-term resilience.
Preserving the driftwood: Once a year, brush a coat of lime sulfur solution onto all exposed driftwood surfaces to maintain the natural silver-white color and prevent mold. Do this in late winter or early spring before new growth begins.
Pruning: In year one, limit pruning to removing excessively long or poorly positioned branches. From year two onward, follow the standard pruning schedule appropriate for the species used.
Common Mistakes and How to Fix Them
Even experienced artists encounter problems when practicing the tanuki bonsai technique. Here are the most common pitfalls and effective remedies:
Mistake 1: Tree fails to root into the driftwood Usual cause: the driftwood was treated with chemical preservatives (common in industrially processed aquarium wood) or the surface is too smooth. Fix: score the channel surface lightly with a chisel to create texture, and ensure the roots make direct contact with raw wood.
Mistake 2: Tree wilts after attachment Typically caused by transplant shock from the sudden environmental change. Do not panic — the tree may drop leaves in the first 1–2 weeks but will recover if the root system is intact. Move to a shaded location, maintain even moisture, and wait. If there is no sign of recovery after four weeks, inspect the roots.
Mistake 3: Driftwood develops mold Occurs when the wood was not thoroughly treated or the environment is too humid. Scrub off visible mold with a stiff brush, dry in direct sun, then apply lime sulfur solution over the entire wood surface.
Mistake 4: Securing wire cuts into the trunk If wire is not removed at the right time (typically after 3–4 months), it can bite into the bark. Inspect wires every month — as soon as the bark begins swelling around the wire, remove it immediately. Small wounds heal on their own, but deep scars permanently affect the aesthetics.
The tanuki bonsai technique demands patience and careful observation, but the reward — a composition that looks centuries old — is well worth the effort. Start with an easy species such as Ficus or Fukien tea to master the fundamentals before attempting more demanding trees.
Tags
#tanuki-bonsai#driftwood-bonsai#advanced-bonsai-technique#bonsai-shaping#ancient-bonsaiGet bonsai guidance every week.
Fresh care guides, styling notes, and bonsai inspiration delivered to your inbox.