Air Layering Bonsai: Achieve a High Success Rate
InBonsai Team
March 26, 2026 · 9 min read
Air layering is one of the most effective bonsai propagation techniques, allowing you to create a new tree with a fully developed root system without starting from seeds or waiting months for cuttings to root. Unlike stem cuttings — which rely on the cutting’s ability to root in isolation — air layering keeps the branch attached to the parent tree throughout the entire rooting process, providing a continuous supply of nutrients and dramatically improving the success rate. If you want to propagate a beautiful bonsai branch without gambling on a high failure rate, this guide will walk you through every step: from preparing your tools, processing the wound, to recognizing when the roots are ready and separating the new tree.
What Is Bonsai Air Layering and Its Key Advantages
Air layering (also known as marcotting) is a technique that stimulates root growth directly on a branch while it remains attached to the parent tree. The practitioner removes a ring of bark from the branch, then wraps a moist medium around the wound to trigger new root formation. Once roots develop sufficiently, the branch is cut away and grown as an independent tree.
Compared to stem cuttings or growing from seed, air layering offers clear advantages:
- High survival rate: The branch continues to be fed by the parent tree throughout rooting — no water or nutrient stress
- Preserves the parent’s traits: The new tree inherits 100% of the parent’s genetics, crucial for special cultivars, beautiful flowers, or small-leaf varieties
- Faster rooting: Typically only 4–12 weeks depending on species, versus 3–6 months for stem cuttings
- Works on large branches: No size restrictions like stem cuttings
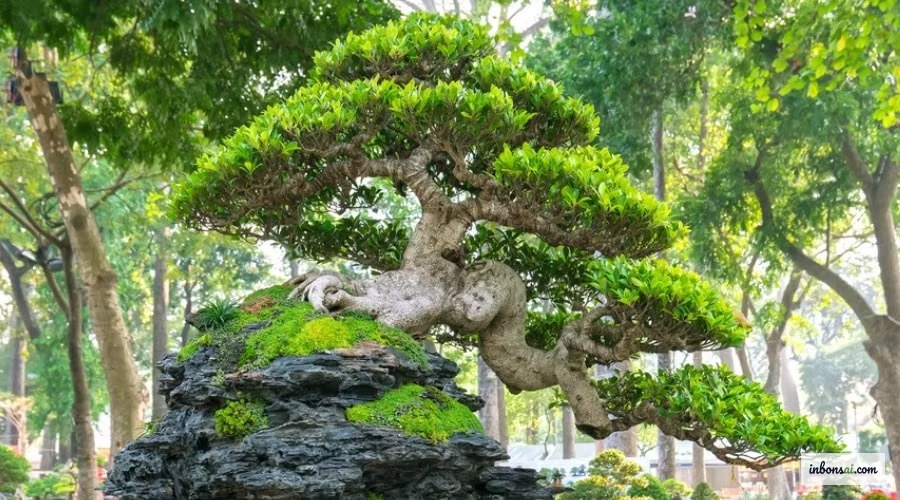
This method is especially effective for popular bonsai species such as Ficus (fig trees), Barringtonia (lộc vừng), Fukien Tea, and most tropical species.
Tools and Materials You’ll Need
To achieve a high success rate with bonsai air layering, having everything ready before you start is essential. Missing any of these items can significantly affect your results.
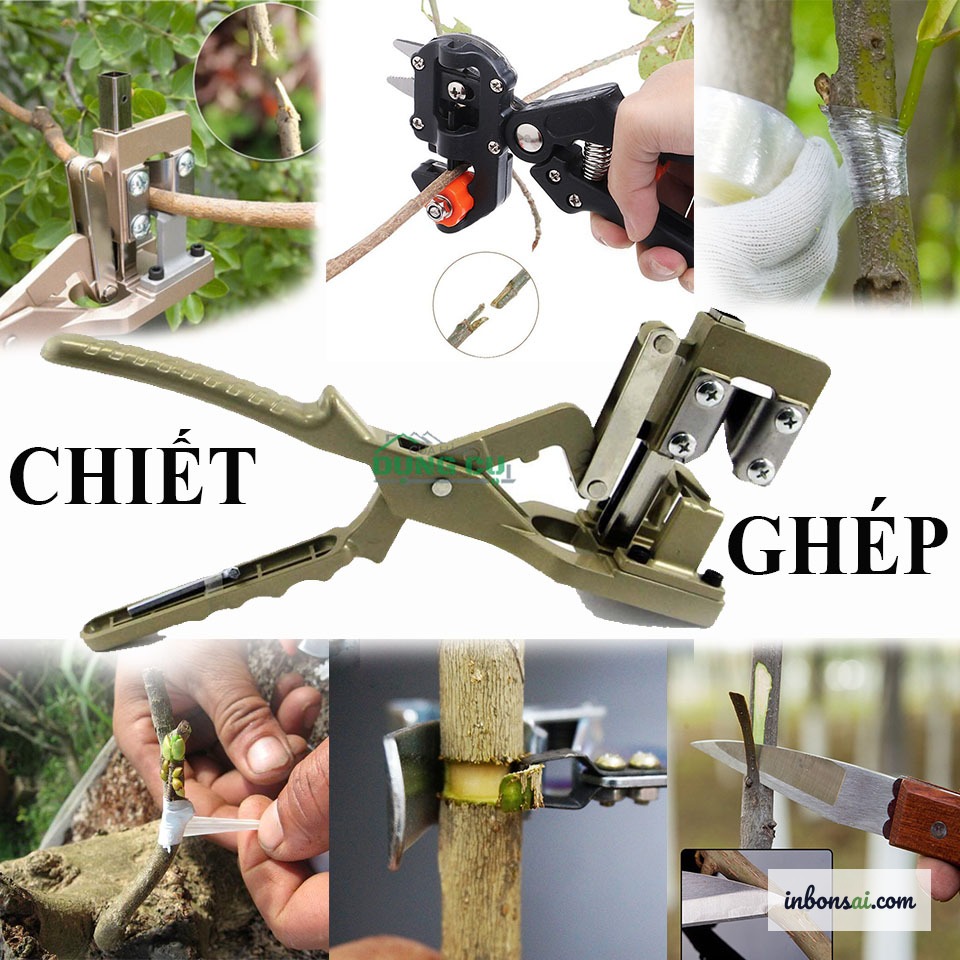
Cutting tools:
- A sharp knife (grafting or utility knife) — sterilized with 70% alcohol
- Bonsai branch cutters
Wrapping materials:
- Sphagnum moss: ideal moisture retention, breathable — the best medium for air layering
- Or moist coconut coir as an alternative
- Clear plastic wrap (transparent so you can observe roots without disturbing the layer)
- Ties or thin wire to secure both ends of the wrap
Rooting hormone (optional but highly recommended):
- IBA (Indole-3-butyric acid) rooting powder or gel
- NAA (naphthaleneacetic acid) rooting solution
- Raw honey (natural, antibacterial alternative)
Important: Your knife must be truly sharp to create clean, precise cuts — a dull blade crushes tissue and dramatically increases the risk of fungal infection.
Step-by-Step Air Layering Technique
This is the most critical stage — doing it correctly from the start determines the majority of your success rate.
Step 1: Select Your Branch
Choose a branch 0.5–3 cm in diameter, semi-hardwood (not too young, not too old), free from pests or disease. A branch with plenty of leaves in active growth will root faster. Identify your air layer point 15–30 cm from the branch tip, depending on how much length you want to retain.
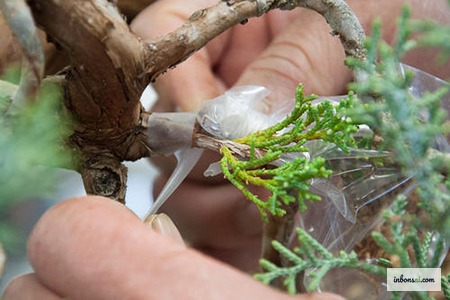
Step 2: Ring Bark the Branch
Two common methods:
Method 1 — Ring Bark Removal: Cut two complete circles around the branch, 2–3 cm apart (approximately 1.5× the branch diameter). Remove all bark between the two cuts. Scrape away the cambium layer (the green tissue just beneath the bark) to prevent bark from growing back over the wound.
Method 2 — Tongue Cut: Cut at a 45° angle into the branch to about 1/3 of its diameter, then cut back from the other direction. Prop the wound open with a toothpick. This method works well for softer branches.
Step 3: Apply Rooting Hormone
Immediately after ring barking, apply rooting hormone powder, gel, or honey evenly across the entire wound surface. This step can reduce rooting time by 30–50% and is one most beginners skip.
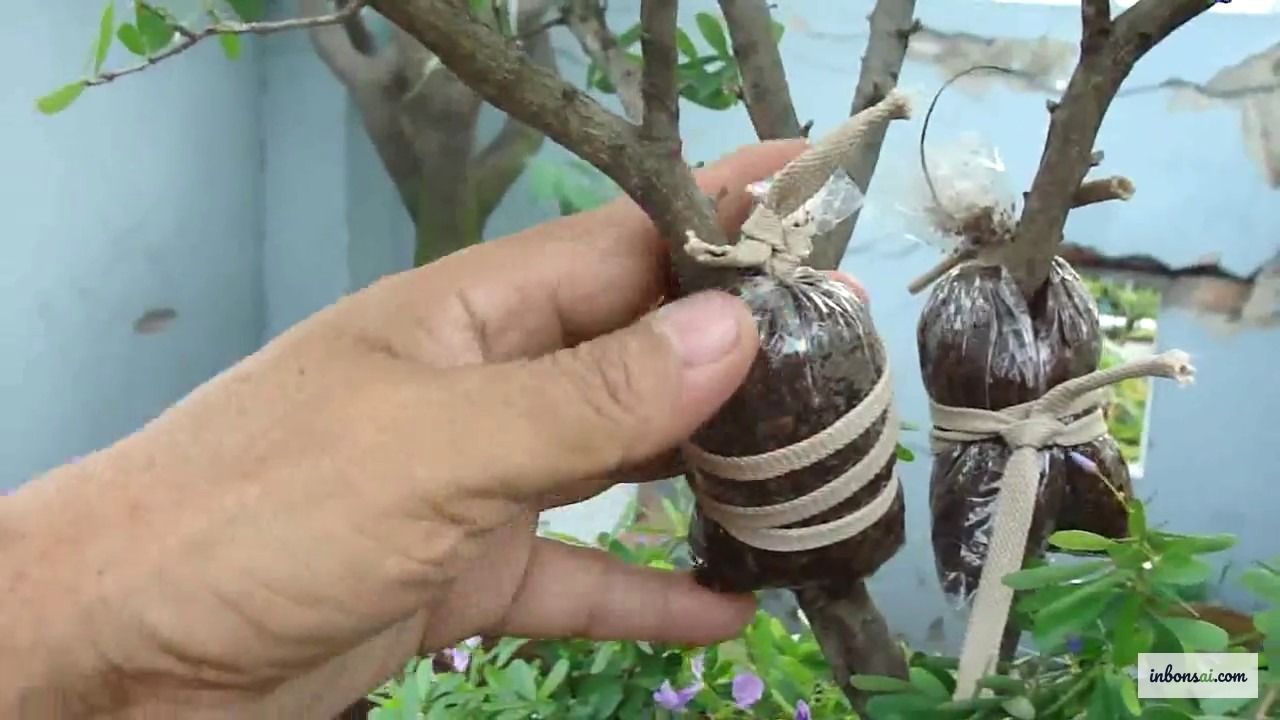
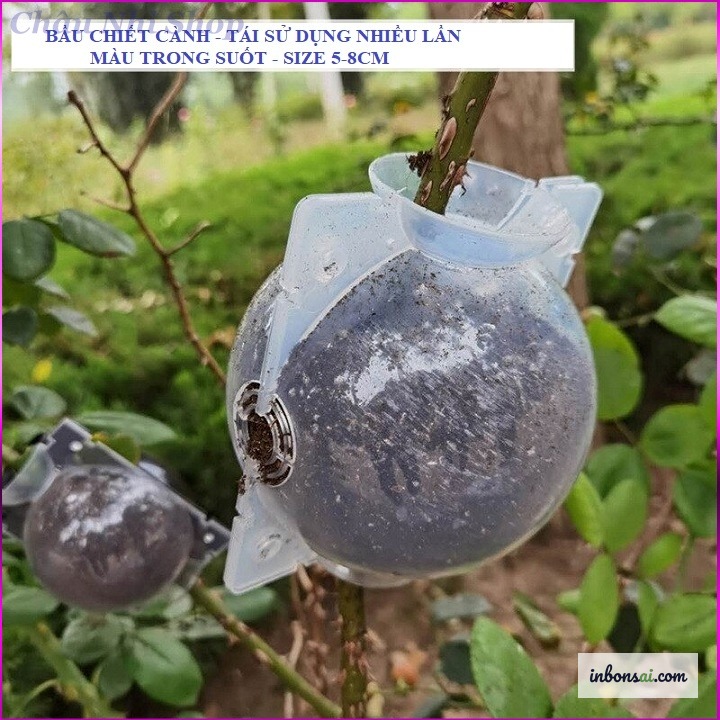
Step 4: Wrap the Moss Ball
Soak sphagnum moss in water, then squeeze out excess until it’s moist but not dripping. Wrap a generous handful of moss around the wound, forming a ball roughly 8–12 cm in diameter. Wrap tightly with clear plastic, securing both ends with ties. Make sure the ball won’t slip down in the wind.
Best Time of Year for Air Layering
Timing significantly affects rooting speed. The key principle: layer when the tree is actively growing, never during dormancy or after a period of stress.
March–May (spring): The ideal window. Trees are in their peak growth surge, metabolism is high, and root formation potential is at its maximum. Spring layers typically root in 4–8 weeks.
September–October (early fall): Also a good choice. Cooler temperatures help the moss stay evenly moist. Be mindful of completing the separation before cold weather arrives.
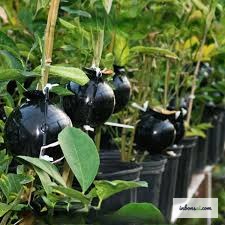
Avoid midsummer (June–August in most of Southeast Asia): High heat dries out the moss ball quickly and can scorch tender new roots. If you must layer in summer, add an opaque outer wrap to insulate against heat and retain moisture.
You can also refer to mai vang propagation methods to see how these principles apply to specific species.
Caring for the Air Layer While Waiting for Roots
After wrapping the layer, your work isn’t done. Proper care during the waiting period makes a significant difference in root quality.
Check moisture weekly: Gently squeeze the plastic to feel whether the moss is still moist. If the ball feels light or no condensation is visible inside the plastic, inject water directly through the plastic using a small syringe — avoid unwrapping, as this disrupts the stable environment inside.
Shade the moss ball: Direct sunlight heats the ball and dries the moss quickly. If the layered branch gets a lot of sun, wrap a cloth or newspaper around the outside of the ball for insulation.
Don’t move the parent tree: Avoid changing the tree’s position while the layer is developing. Sudden changes in light or temperature stress the tree and divert energy away from root formation.
Avoid high-nitrogen fertilizer: Nitrogen promotes leaves and new shoots, not roots. If you fertilize, choose a high-phosphorus formula (e.g., NPK 6-30-30) to support root development.
Recognizing a Successful Layer and When to Separate
One of the most common questions: when is it safe to separate the branch? The answer isn’t a fixed number of weeks — it depends on the actual root development.
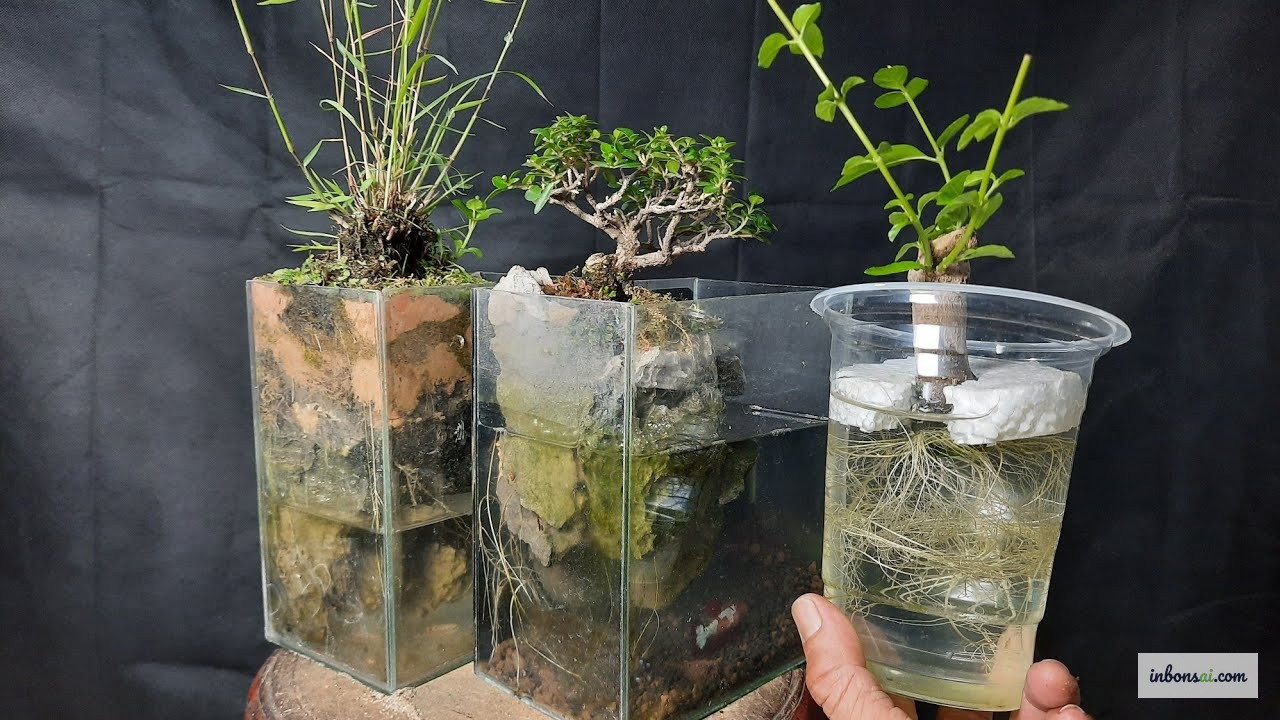
Signs the roots are ready:
- White or pale yellow roots are visible through the clear plastic, distributed evenly around the ball
- Roots are at least 3–5 cm long with many secondary rootlets branching off
- Roots fill at least 50–70% of the moss ball volume
Don’t separate too early when roots have just barely appeared — the young tree won’t be able to absorb enough water and will wilt within days.
Proper separation technique:
- Cut the branch below the moss ball with sharp cutters, making a clean cut
- Do not remove the moss ball — plant the entire moss ball in the new pot; young roots break extremely easily
- Use a well-draining soil mix (refer to bonsai soil mix ratios with akadama, pumice, perlite)
- Place in diffused light — avoid direct sun for at least 2–4 weeks
- Remove about 1/3 of the foliage to reduce transpiration while the tree adapts
Common Air Layering Mistakes and How to Fix Them
Even though air layering has a high success rate, it will fail if you make any of these key mistakes.
Mistake 1: Incomplete cambium removal If you don’t scrape away all the cambium, the bark will grow back over the wound within 2–3 weeks, blocking root formation entirely. After removing the bark, confirm the wound surface looks creamy white or light tan — no green remaining.
Mistake 2: Moss too wet or too dry Moss that’s too wet causes new roots to rot; too dry prevents roots from developing. Ideal moisture: the moss should feel damp but not drip when squeezed hard. Check regularly and add water as needed.
Mistake 3: Separating too early Impatience when roots are only a few millimeters long leads to tree death within 1–2 weeks. Wait for roots to be long and branched before cutting.
Mistake 4: No shade after separation A freshly separated tree has tender new roots not yet adapted to independent water uptake. Intense sunlight immediately after separation will cause rapid wilting. Keep in 50–70% shade for the first 4 weeks.
Mistake 5: Using a dull blade Crushed tissue from a dull knife creates ideal conditions for fungal and bacterial infection. Always use a genuinely sharp, sterilized blade.
Once your new tree is established (typically 6–8 weeks after potting), you can begin considering repotting and root work to shape the tree in your desired style.
Best Bonsai Species for Air Layering
Not all species root with equal ease. Here are common Vietnamese bonsai species ranked by air layering difficulty:
Easy — high success rate (>90%):
- Ficus species (F. racemosa, F. benjamina, F. pumila) — roots appear in just 3–6 weeks
- Barringtonia (lộc vừng) — extremely easy, roots in 4–8 weeks
- Fukien Tea (linh sam) — easy, especially in spring
Moderate (70–90%):
- Vietnamese yellow apricot (mai vàng) — possible but requires good rooting hormone and timing
- Orange jasmine (nguyệt quế, Murraya paniculata) — roots in 6–10 weeks
- Japanese honeysuckle (kim ngân)
Difficult — requires experience (<70%):
- Buddhist pine (tùng la hán, Podocarpus) — slow to root, needs 10–16 weeks with very consistent moisture
- Pine (Pinus) — air layering is not ideal; grafting is recommended instead
Air layering, done correctly, is a powerful tool to expand your collection without purchasing new trees. You can propagate the most beautiful branches from your favorite existing bonsai. Start with easy species like Ficus or Barringtonia to build confidence, then move to more challenging species as you master the fundamentals.
Related Posts
Air Layering Bonsai: Achieve a High Success Rate

Bonsai Grafting Techniques for Beginners
Bonsai Stem Cutting Propagation: High Success Guide
Cascade Bonsai Style: A Beginner's Complete Guide