Bonsai Grafting Techniques for Beginners

InBonsai Team
April 10, 2026 · 13 min read
Bonsai grafting techniques are essential tools for any serious bonsai practitioner, yet beginners often avoid them thinking they are too complex. In reality, with the right preparation and a clear understanding of the core principles, even first-timers can achieve successful grafts. Grafting allows you to add branches to bare spots on a trunk, change tree varieties, or rescue a bonsai with a broken critical branch — tasks that no other technique can accomplish. This guide walks you through bonsai grafting step by step, from the basics to more advanced methods, specifically tailored for beginners.
What Is Bonsai Grafting and When Do You Need It
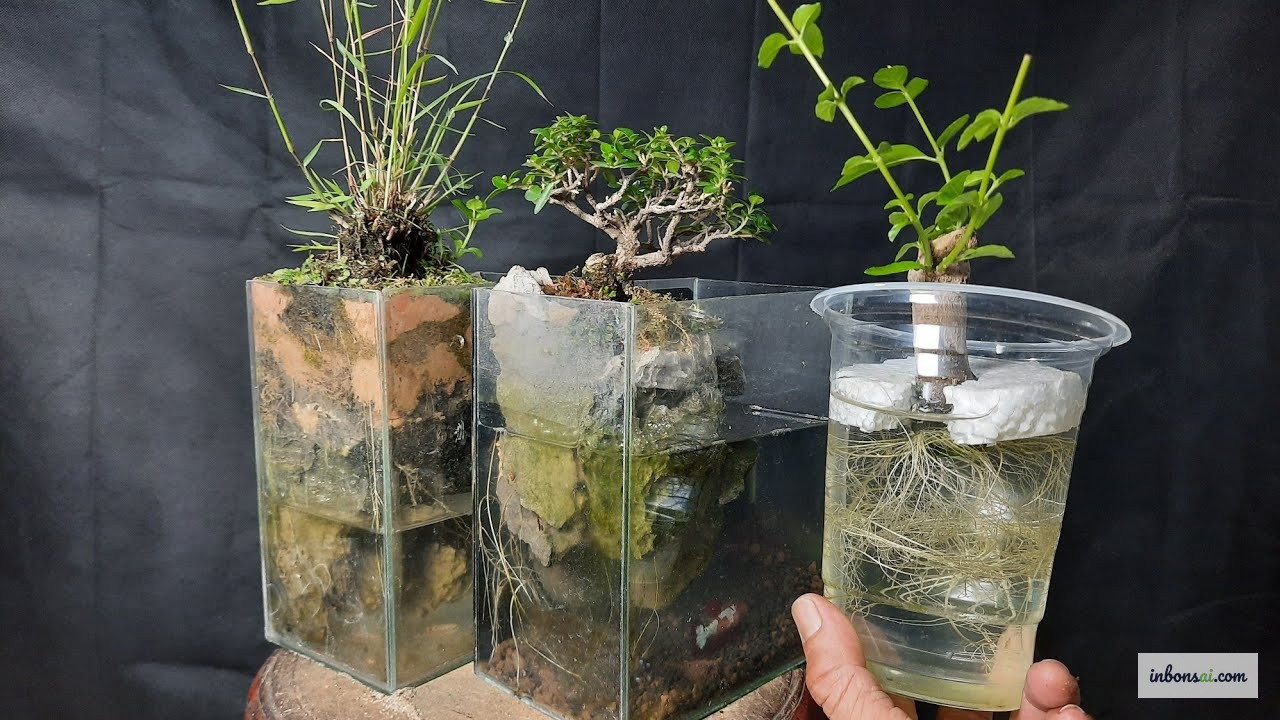
Grafting is the technique of joining living tissue from two different plants — or two parts of the same plant — so that they fuse and grow as one unified organism. In bonsai, grafting typically involves a rootstock (the host tree) and a scion (a bud or shoot taken from another tree).
Unlike air layering or cutting propagation — which clone a plant from a detached piece — grafting focuses on adding new branches at a desired location or changing the variety on an existing tree. This is the fundamental distinction every bonsai learner needs to understand.
You will need grafting in these situations:
- Adding a branch to a bare spot: The tree has a beautiful trunk and base but lacks a branch at a critical position for your intended design
- Rescuing a broken branch: A primary branch snaps off by accident; grafting on a new branch preserves the structure you’ve spent years building
- Changing varieties: Grafting buds from a fine-leafed or beautiful-flowering variety onto a rootstock that already has an aged trunk and root system
- Improving the nebari: Root grafting adds surface roots to the front face of the pot for a more natural, dramatic appearance
The single most important principle: grafting only succeeds when the cambium layer (the thin green tissue just beneath the bark) of both the rootstock and the scion make direct, precise contact. The cambium is where the tree’s actively dividing cells live — when the two cambium layers fuse, the graft takes. Every grafting method is built around this principle.
Common Bonsai Grafting Methods

Several grafting methods exist for bonsai, each suited to different situations and skill levels. Beginners should start with the simplest approaches before progressing.
Approach Grafting (Inarching)
This is the easiest method with the highest success rate — ideal for beginners. The scion remains attached to the mother plant throughout the healing process, meaning it never loses its nutrient supply while the graft union forms. Only after the graft has fully taken do you sever the scion from the mother tree.
Approach grafting is most commonly used to add a branch at a specific missing location on a bonsai trunk.
Cleft Grafting
A V-shaped cut is made into the rootstock, and the scion — carved to a matching wedge shape — is inserted into the slot. This method works well when the rootstock is significantly larger than the scion, and is often used to graft buds onto a large branch stub that has been cut back.
Bud Grafting
Instead of grafting an entire shoot, you cut only a single bud (dormant growth point) from the donor tree and insert it into a corresponding cut on the rootstock. This method conserves scion material and causes less trauma to the receiving tree, but requires more precise cutting technique.
Thread Grafting
A technique unique to bonsai: a living branch is threaded through a hole drilled through the trunk or another branch of the same tree, allowing two surfaces to make contact and fuse naturally. Used to add a branch at a very specific location without needing an external donor tree.
Tools and Materials You Need
Preparing all your tools before you begin grafting is crucial to success. During the grafting process, you need to work quickly to prevent cut surfaces from oxidizing and drying out — stopping mid-way to search for a tool dramatically increases failure rates.
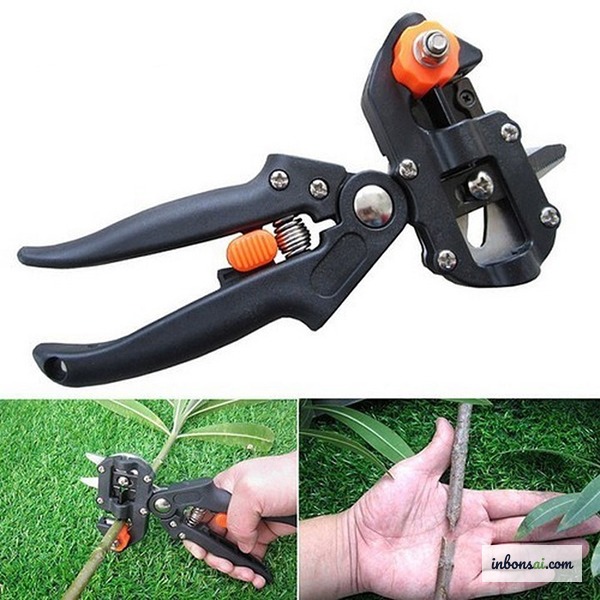
Grafting knife: Unlike ordinary knives, a grafting knife has a single-beveled blade that creates perfectly flat, clean cuts. This is your most important tool — investing in a good quality grafting knife (roughly $15–40 USD) makes a tangible difference. The blade must be sharp enough to complete a cut in a single pass without sawing back and forth.
Grafting tape: A specialized elastic tape for binding the graft union. Unlike regular adhesive tape, grafting tape is moisture-resistant, slowly biodegrades over time, and does not constrict the branch as it grows. Parafilm or thin plastic strips can substitute in a pinch.
Grafting wax or paste: Applied over the contact surfaces and the outside of the tape to prevent moisture loss and block bacterial entry. If you don’t have specialized grafting wax, beeswax or a thin coat of cut paste will work.
70% isopropyl alcohol: Sterilize your knife and hands before every cut. Pathogens from unwashed hands can enter the open graft wound and ruin all your effort.
Plastic bag or humidity chamber: Wrap around the graft union to create a high-humidity microenvironment, reducing moisture loss through the scion during the critical early days.
For a complete list of bonsai tools you should own, check out our essential bonsai tools guide.
Step-by-Step Bonsai Grafting Technique
Below is a detailed walkthrough for approach grafting — the method recommended for beginners due to its consistently high success rate.
Step 1: Prepare the Mother Plant and Host Tree
Select a healthy branch from a donor tree (or the same species) as your scion. The scion’s diameter should ideally match the position where you want to graft it on the host tree. Place the donor pot next to the host tree, positioning it so the scion branch naturally reaches the desired grafting point without excessive bending.
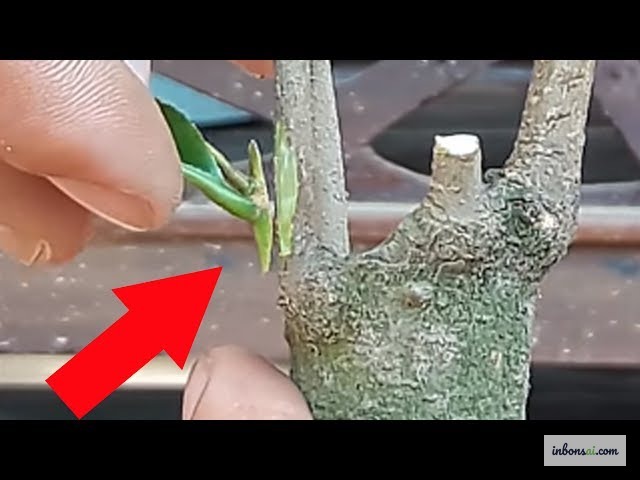
Step 2: Create the Graft Wounds
Using your sterilized grafting knife, cut a shallow slice on the scion branch: make a cut about 3–5 cm long, penetrating roughly 2–3 mm into the wood — just deep enough to expose the cambium without weakening the branch. Cut an identically sized wound at the chosen grafting point on the host tree.
Critical: both cuts must be flat and clean, with no ragged edges. If the cuts are not smooth, the two cambium surfaces won’t make consistent contact, and the graft will form unevenly or fail.
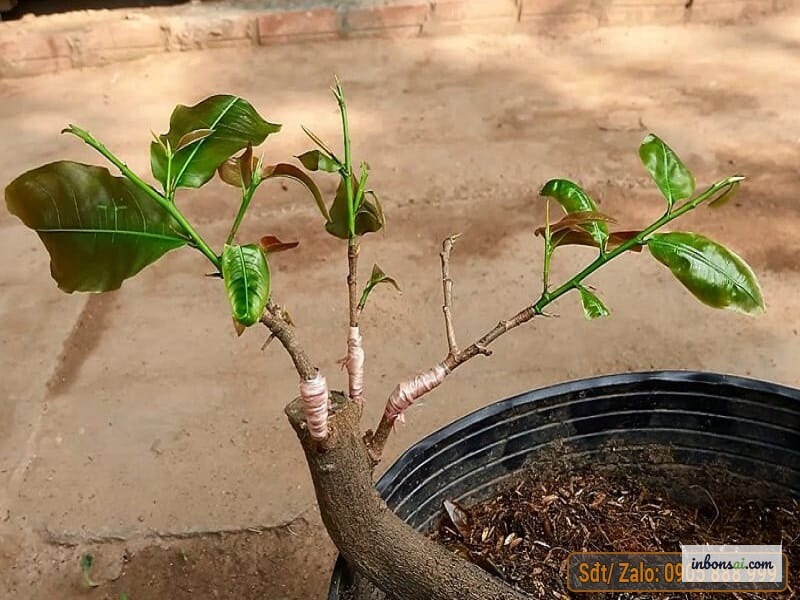
Step 3: Press and Secure
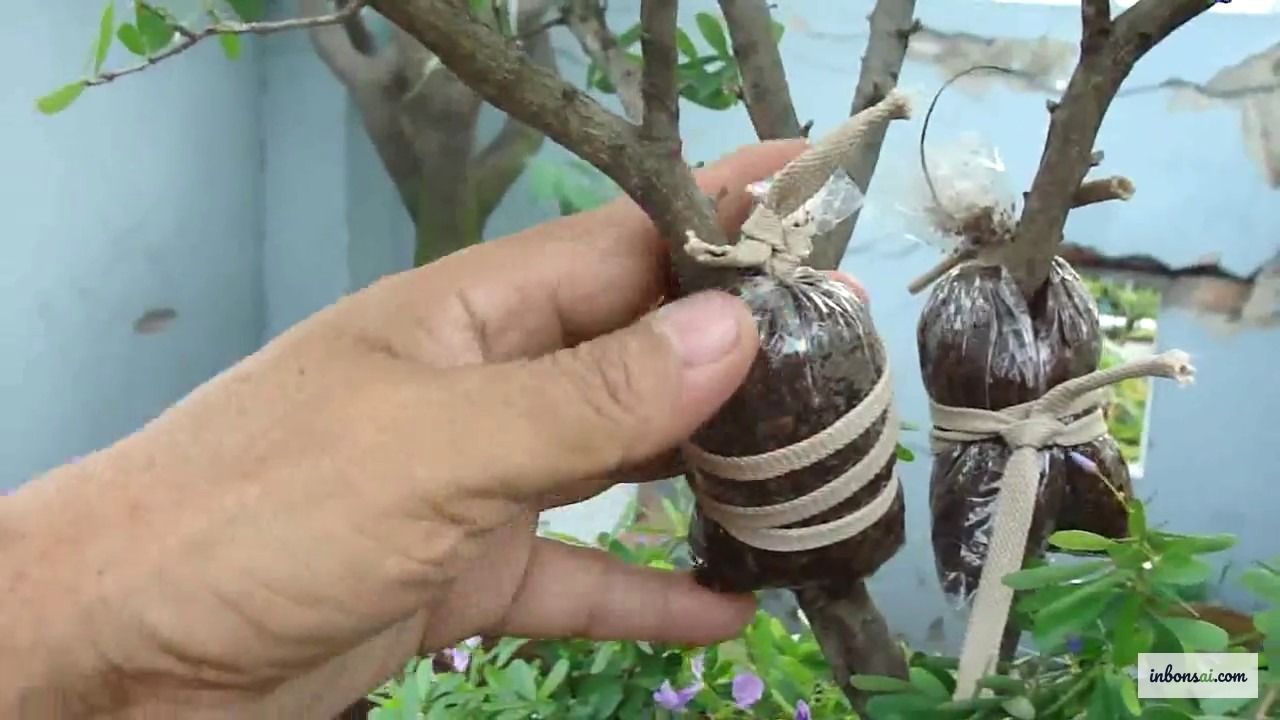
Press the two cut surfaces together immediately after cutting — air exposure dries out the cambium layer very quickly. Make sure at least one edge of each cambium aligns precisely. If the two branches differ in diameter, position them so the cambium of the scion lines up with at least one side of the host’s cambium.
Wrap with grafting tape from bottom to top, each turn overlapping the previous by about half the tape width. Wrap firmly enough that the two surfaces cannot shift, but not so tightly that you crack the bark.
Step 4: Protect the Graft Union
Apply grafting wax or beeswax over the entire wrapped area. If possible, cover with a small plastic bag for the first 7–10 days to maintain high humidity around the union and reduce moisture loss through the scion.
Step 5: Monitor and Wait
For 3–6 weeks after grafting, leave the entire setup undisturbed — do not move the trees, avoid over-watering, and don’t apply heavy fertilizer. After 3–4 weeks, gently press on the scion — if the union feels “solid” and the scion begins pushing new growth, the graft has taken.
Step 6: Sever from the Mother Plant
Once the graft has fully taken (usually 6–10 weeks, depending on species), sever the scion from the mother plant below the graft point. Do this in stages: cut halfway through first, wait 1–2 more weeks, then make the final cut. This allows the scion to gradually adjust to drawing nutrients from the host rather than experiencing a sudden shock.
Best Timing for Grafting Throughout the Year
Not every season is equally suited for bonsai grafting. The general rule: the cambium is most active during spring and early summer, when the tree is in its peak growth flush.
February–April (best): Early spring, as buds begin to break, the cambium is highly active. Graft unions form quickly and strongly. This is the ideal window for bonsai grafting in Vietnam, especially for broadleaf species.
September–October (good): Early fall, when cooler temperatures return after the rainy season, is also a good time — especially in southern Vietnam where post-monsoon growth is vigorous.
Avoid peak summer (June–August): High temperatures cause the scion to lose moisture faster than the graft union can form. If you must graft in summer, provide shade and maintain higher-than-normal ambient humidity.
Avoid cold winter: In northern Vietnam, when temperatures drop below 15°C (December–January), cambium activity slows dramatically and wounds heal very slowly — creating a window for fungal infections to set in before the union forms.
Beyond season, always graft only when your tree is healthy, pest-free, and not freshly repotted. A stressed tree prioritizes its own recovery over healing a new graft wound.
Aftercare for a Successful Graft Take
The post-grafting period is where success or failure is ultimately decided — proper care in the 4–8 weeks after grafting makes an enormous difference.
Light and temperature: Place the tree in bright, filtered light, avoiding direct midday sun for at least 2–3 weeks. Intense sun causes the scion to lose moisture faster than the graft union can heal. Ideal temperatures are 18–28°C — extremes in either direction slow the healing process.
Watering: Maintain consistent, moderate soil moisture — never let it dry out completely, but avoid soggy soil. Proper moisture supports the tree’s osmotic pressure and helps transport nutrients to the graft site. Avoid watering directly onto the graft union, as pooling water can loosen the tape and encourage fungal growth.
No fertilizer for the first 4 weeks: High-nitrogen fertilizer stimulates vigorous new shoot growth, but if the graft hasn’t yet fully fused, that energy gets scattered inefficiently. Once the graft has taken and the scion is actively pushing new growth, you can begin with half-strength fertilizer.
Monitor for success and failure: After 2–3 weeks, observe the scion closely. New buds pushing open and leaves unfolding with fresh green color indicate the graft is taking well. Conversely, yellowing leaves, wilting, and progressive leaf drop suggest the graft has failed — remove the tape, inspect the union, and plan to try again.
Remove tape at the right time: After the graft has fully fused (typically 6–10 weeks), remove the grafting tape to prevent it from constricting the branch as it thickens. Leaving tape too long causes it to cut into the bark, creating an ugly constriction ring.
If you’re not yet confident at reading your tree’s stress signals after technical procedures, review our guide on identifying and treating common bonsai diseases to catch early warning signs.
Best Species for Learning Bonsai Grafting
Not all species graft with equal ease. When starting out, choose species with high graft-take rates to build your skills and confidence before tackling more challenging trees.
Easy — ideal for beginners:
- Ficus species (Ficus racemosa, F. benjamina, F. pumila): Thick, active cambium; approach grafts take in 3–5 weeks. The best practice species for learning.
- Barringtonia (lộc vừng): Recovers rapidly; fuses well in spring conditions.
- Fukien tea (Carmona retusa): Popular and widely available; approach grafting gives excellent beginner results.
Intermediate — needs more experience:
- Vietnamese yellow apricot (Ochna integerrima): Grafting possible but requires higher precision on timing and cut quality.
- Orange jasmine (Murraya paniculata): Prone to fungal infection if the graft wound is not properly protected; thorough sterilization is critical.
Difficult — experienced practitioners only:
- Pine and podocarpus: Resinous wood can block the graft union; requires specialized techniques. Master the basics on deciduous and tropical species first.
Common Mistakes in Bonsai Grafting and How to Avoid Them
Despite what it looks like, most grafting failures come from a handful of avoidable mistakes.
Mistake 1 — Cambium misalignment: The number one cause of failure. Even if the tape is perfectly applied, misaligned cambium layers mean the graft cannot fuse. Solution: cut flat, press immediately, verify alignment by eye before wrapping.
Mistake 2 — A dull knife: An unsharp blade creates ragged cuts. Sharpen your knife before each grafting session — a properly sharp knife should slice cleanly through paper without tearing. Don’t cut corners on your most important tool.
Mistake 3 — Letting cut surfaces air out: Even a few minutes is enough for the cambium to oxidize and dry. Have your tape ready before you make the cuts, and press and bind immediately.
Mistake 4 — Wrong timing: Grafting in cold winter or when the tree is stressed gives very high failure rates. Always graft when the cambium is active — spring is safest.
Mistake 5 — Forgetting to protect scion moisture: In non-approach-grafting methods, the detached scion loses moisture very rapidly after cutting. Wrapping with plastic or using a humidity bag in the first week is non-negotiable.
Why do first-time grafts fail so often? Usually it’s multiple small factors compounding: a slightly dull knife, a slightly uneven cut, cambium off by a millimeter, then an unexpected hot day. That’s normal — every graft attempt is a lesson. After 2–3 practice runs, you’ll clearly feel the difference between a clean, textbook cut and one that isn’t quite there yet.
If you’d like to combine grafting with propagation, our guide on bonsai air layering techniques pairs beautifully with grafting — the two methods complement each other well in building out a collection.
Bonsai grafting opens the door to a higher level of tree artistry — where you’re not just maintaining a tree but actively designing and reshaping it to your vision. Start with approach grafting on a ficus or Barringtonia, watch the graft union patiently for every small sign of progress, and don’t be discouraged by an initial setback. With each attempt, your technique sharpens — and the moment you see fresh green growth pushing from your first successful scion is a reward worth every minute of careful practice.
Related Posts
Bonsai Grafting Techniques for Beginners
Air Layering Bonsai: Achieve a High Success Rate
Bonsai Stem Cutting Propagation: High Success Guide
Cascade Bonsai Style: A Beginner's Complete Guide