Bonsai Root Over Rock: Complete Ishitsuki Guide
InBonsai Team
April 5, 2026 · 10 min read
Root over rock bonsai — known as “Ishitsuki” (石付き) in Japanese — is one of the most visually striking and artistically rich styles in the world of bonsai. When you see a tree with bare roots clutching a rock, winding dramatically around its surface before plunging into the soil below, you immediately picture ancient trees growing from cliffsides and rocky mountain peaks. Creating a root over rock bonsai is more achievable than you might think — with the right technique, patience, and materials, you can build a stunning composition right at home. This guide walks you through every step.
What Is Root Over Rock Bonsai (Ishitsuki)?
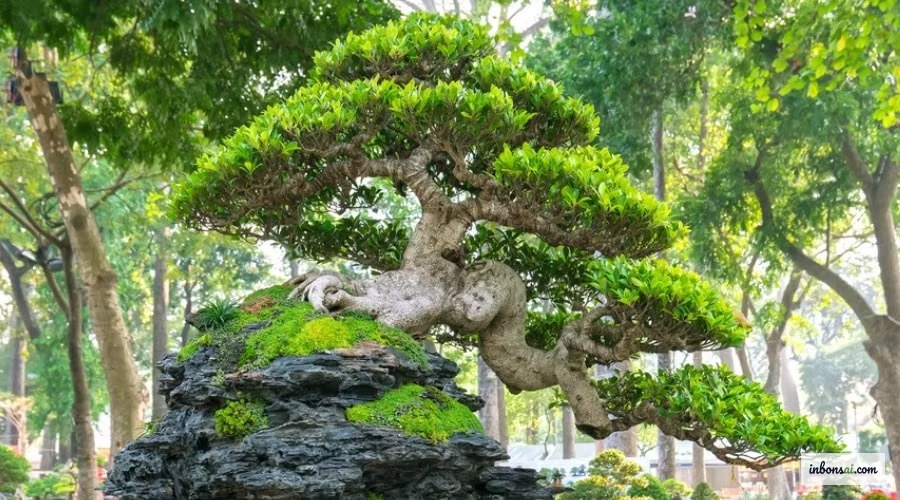
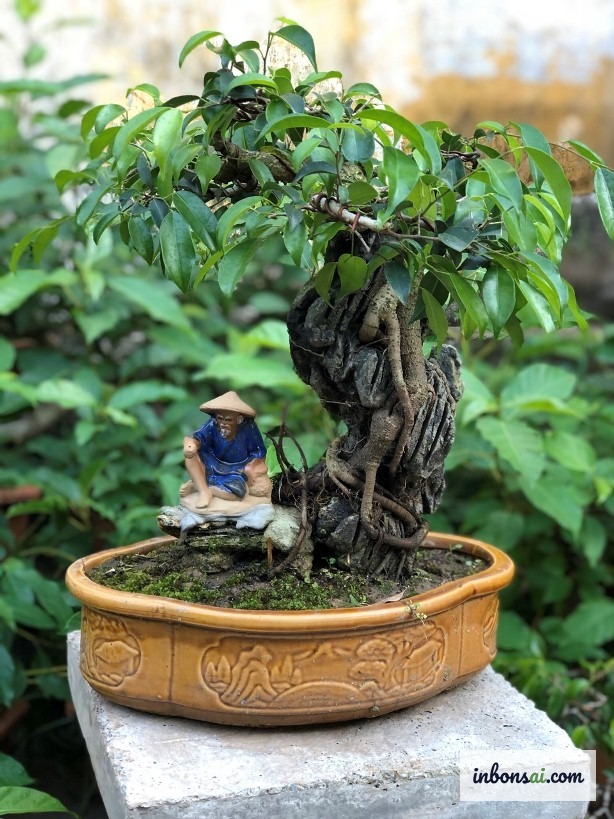
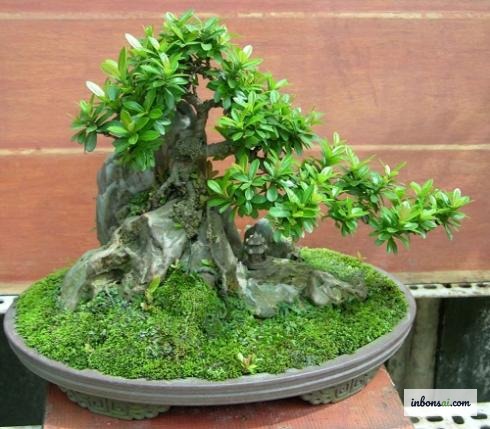
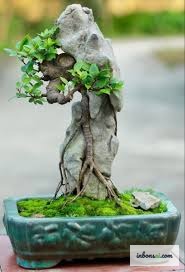
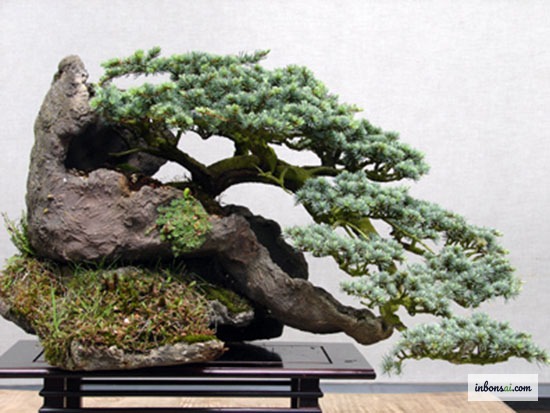
Root over rock bonsai is a style where a tree’s roots are trained to grip the surface of a rock, wrapping around it naturally before descending into a pot or soil below. This style mimics the appearance of trees found in nature growing from rocky outcrops, their roots reaching into crevices to find water and nutrients over decades or centuries.
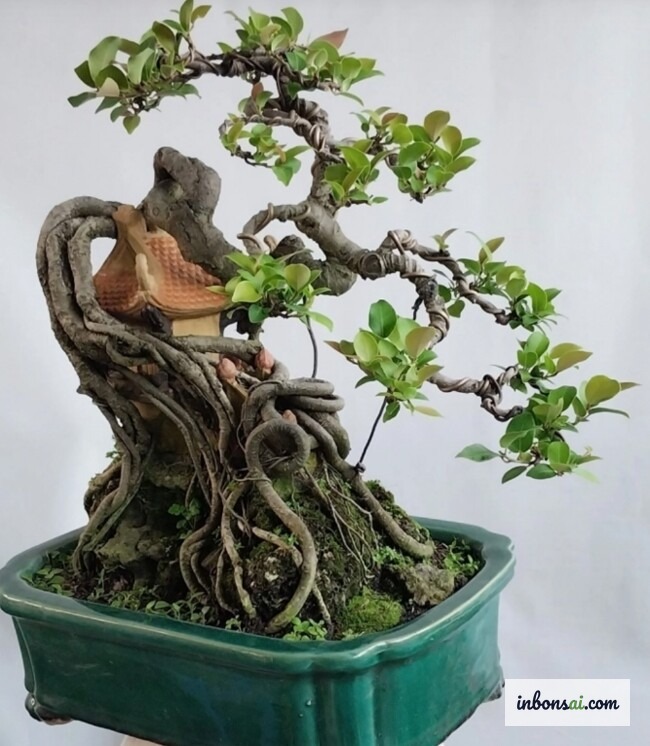
In traditional Japanese bonsai, Ishitsuki has two main variations: Sekijoju (roots growing directly inside the rock, utilizing natural crevices) and the classic root over rock style where roots flow across the outside surface of the rock and extend into the pot below. For most bonsai enthusiasts — especially beginners — the root over rock approach is more accessible and produces dramatic results.
What makes this style particularly compelling is the element of time: roots need months, sometimes years, to grip firmly and develop that natural, flowing appearance around the stone. Ishitsuki embodies the core philosophy of bonsai — that great beauty requires patience and collaboration with nature.
Explore more about bonsai styling in our guide to Bonsai Styles: A Complete Guide to Tree Shaping.
Choosing the Right Tree for Root Over Rock
Not every tree species works well for root over rock styling. You need a tree with flexible, fast-growing roots that can grip and wrap around stone. Here are the top species favored by bonsai artists:
Ficus (Ficus benjamina, Ficus retusa): The top choice for this style. Ficus trees produce abundant aerial roots that are extremely flexible and grip rock surfaces well. They’re also tolerant of heavy pruning and recover quickly from root manipulation.
Trident Maple and Japanese Maple: Produce dramatic surface roots that look spectacular draped over rocks. Slower growing than Ficus, but the result is worth the wait — especially for deciduous fall color effects.
Juniper and Pine: Classic bonsai species that create beautifully aged-looking root-over-rock compositions. Best for experienced growers due to slower development.
Buttonwood (Conocarpus) and Bougainvillea: Fast root growth, easy to train, and produces vivid visual contrast between the tree’s character and the rock.
Key selection criteria: Choose young trees (1-3 years old) with multiple long, flexible roots. Avoid trees with already-lignified (woody) roots — these break under bending pressure and are nearly impossible to train over rock successfully.
How to Choose the Right Rock
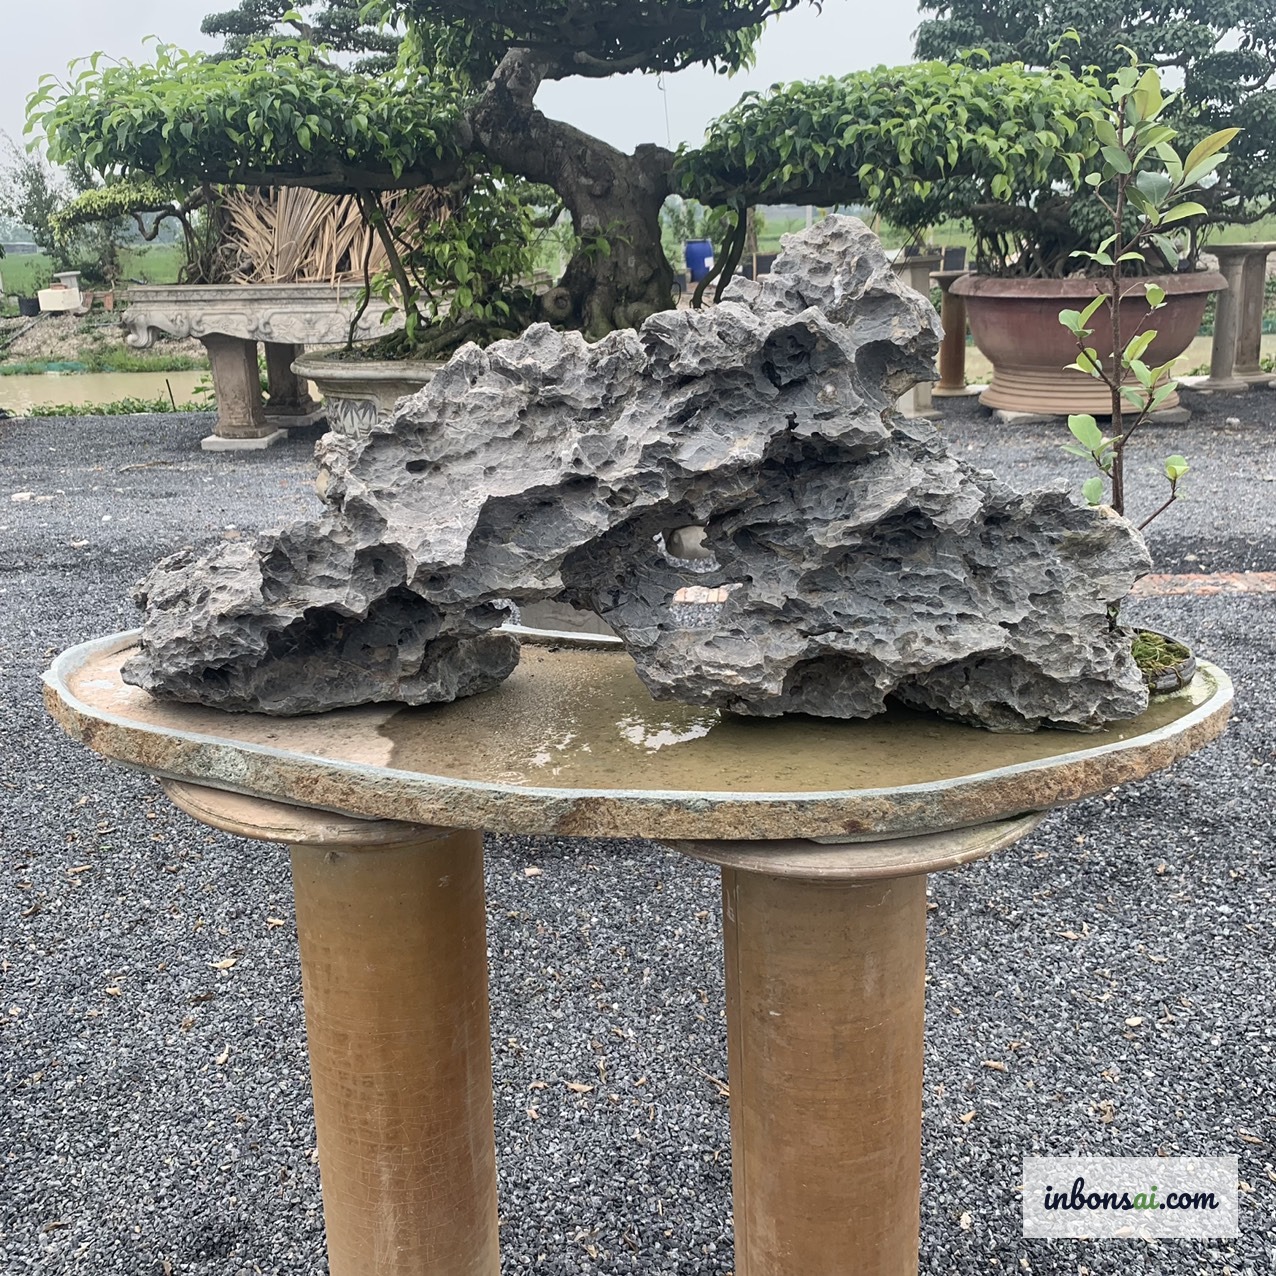
Selecting the right rock accounts for about half of the visual success of a root over rock composition. A great rock provides not just aesthetic impact but structural support for the roots to grip.
Rock shape: Prioritize rocks with irregular, organic shapes that suggest mountains, cliffs, or ancient outcroppings. Rocks with natural crevices, ridges, and grooves are ideal — they give roots channels to follow and grip points to anchor into. Avoid perfectly smooth, rounded rocks as roots will slide off during training.
Rock material:
- Limestone and coral rock: Porous and moisture-retaining — roots grip well and benefit from residual humidity. Note that limestone may gradually raise soil pH.
- Granite and gneiss: Dense, durable, and long-lasting. May need scored grooves to help roots grip initially.
- Volcanic rock (pumice): Lightweight and porous, excellent for root development, but brittle with smaller sizes.
- River stones: Can work, but should be thoroughly cleaned and dried before use to remove potential pathogens.
Size: The rock should be proportional to the tree — typically one-third to one-half the total height of the finished composition. Too small and the composition loses drama; too large and the tree gets visually swallowed.
Tools and Materials You’ll Need

Before starting, gather everything you need to avoid interrupting the process — bare roots dry out quickly once exposed.
Tools:
- Aluminum wire (1-2mm gauge) for securing roots to rock
- Root rake and scissors for root work
- Small brush to apply soil paste to the rock
- Soft brush or paintbrush for spreading root mixture
- Thin bamboo stick or probe for guiding roots into crevices
Materials:
- Chosen tree with flexible roots (prepared and cleaned)
- Selected and cleaned rock
- Bonsai soil mix (akadama + pumice + light loam)
- Sphagnum moss or fresh moss to wrap roots
- Wide, shallow training pot
- Soft binding wire or raffia for early-stage securing
Special soil paste for rock adhesion: Mix 60% fine clay soil + 20% well-decomposed organic matter + 20% sifted clay powder. This mixture is sticky enough to adhere to the rock surface and hold roots in place while still providing nutrition. See our guide to bonsai soil mixes for different tree types for more detail.
Step-by-Step: How to Create Root Over Rock Bonsai
This is the most critical phase — work slowly and carefully to avoid damaging roots. Have all your materials ready before removing the tree from its pot.
Step 1 — Prepare the tree: Remove the tree from its pot and wash all soil from the roots using room-temperature water. Soak the roots in water for 10-15 minutes to make them pliable. Identify the longest, most flexible roots suitable for draping over the rock.
Step 2 — Plan the composition: Set the rock on your work surface and study it from multiple angles. Determine the “front face” — the side with the most visual interest — and mentally map how roots will follow the stone’s natural lines.
Step 3 — Apply soil paste to the rock: Using a small brush, apply your soil paste mixture into the rock’s crevices and along the surface where roots will travel. This gives roots immediate nutrition and acts as an adhesive to hold them in position initially.
Step 4 — Position the tree and route the roots: Place the tree’s base at the chosen position on the rock. Gently route each root along the stone’s natural grooves and ridges. Move slowly — each bend should be gradual, following the rock’s contours rather than forcing sharp angles.
Step 5 — Secure with wire: Use thin aluminum wire or raffia to hold roots against the rock surface. Wrap loosely — roots need room to thicken and grow. After 6-12 months, roots will grip naturally and the wire can be removed.
Step 6 — Wrap with sphagnum moss: Cover all exposed roots with damp sphagnum moss to retain moisture and protect tender roots during establishment. This step is critical for survival during the first weeks.
Planting and Ongoing Care After Styling
With roots secured to the rock, you now need to plant the composition in a suitable container where the roots can continue developing and gripping the stone.
Choosing a pot and planting: Use a wide, shallow training pot — at least 10-15cm wider than the rock on each side. Layer bonsai soil at the base, place the rock-and-tree composition centrally, then fill soil around and between the roots. Leave the upper portion of the rock exposed to showcase the root-over-rock drama.
Watering in the first weeks: Water thoroughly every day for the first 2-4 weeks. Roots need consistent moisture to continue developing and gripping the rock. Never allow the soil to dry out completely during this establishment phase.
Light and placement: Keep the composition in filtered or moderate light for the first 4-6 weeks. Avoid harsh direct sun while roots haven’t yet gripped firmly. Gradually transition to outdoor sun exposure as the tree stabilizes.
Fertilizing: Hold off on strong chemical fertilizers for the first 2 months. You can apply diluted organic fertilizer at one-quarter strength. From month 3 onward, resume normal feeding with balanced NPK fertilizer or organic pellets.
Checking wire: At 3-4 months, inspect whether the wire is cutting into thickening roots. If roots have grown significantly and wire is beginning to bite in, cut and remove the wire immediately. After 6-12 months, most roots will have gripped the rock independently.
Common Mistakes to Avoid
Most failures with root over rock bonsai come from a handful of preventable mistakes:
Mistake 1 — Using a tree with lignified roots: Woody roots snap when bent over stone. Always select young trees with soft, flexible roots that can be gently curved without cracking.
Mistake 2 — Wire too tight: Roots need space to grow and thicken. Overtightened wire creates permanent scarring and can cause root dieback. Secure just enough to hold position — not tight.
Mistake 3 — Letting roots dry out in early weeks: This is the most common cause of root over rock failure. Sphagnum moss and consistent daily watering are non-negotiable during the first 1-3 months.
Mistake 4 — Too much direct sun too quickly: Roots that haven’t gripped firmly cannot supply enough water to the canopy under intense sun. Transition sun exposure gradually to avoid heat stress.
Mistake 5 — Impatience: Many growers dismantle their composition after just 3-4 months thinking it isn’t working. This disrupts roots that are actually progressing well. Allow at minimum 12 months before assessing the result.
Mistake 6 — Fertilizing too heavily early: Strong chemical fertilizers on young, tender roots cause root burn. Wait at least 2-3 months before resuming normal fertilizing.
If you’re new to bonsai, read our beginner’s guide to starting with bonsai before attempting this advanced style.
The Aesthetics and Philosophy of Root Over Rock Bonsai
Root over rock is more than a technique — it’s a philosophy of resilience and adaptation. In nature, trees that survive on rocky outcrops must overcome harsh conditions: poor soil, scarce water, constant wind. Those that survive develop extraordinary character — gnarled, tenacious, fiercely individual.
When you create an Ishitsuki composition, you’re recreating that story in miniature. The roots gripping the rock aren’t just decorative — they’re evidence of a growth journey, a narrative told in living form.
What’s fascinating is that no two root over rock compositions are ever the same. Each rock’s unique shape, combined with each tree’s individual root pattern, creates an unrepeatable work of art. This is why many bonsai masters consider Ishitsuki the highest form of personal artistic expression within bonsai — where the artist must work in harmony with nature rather than imposing their will upon it.
The journey to a finished root over rock bonsai may take years, but each month you’ll see roots grip a little tighter, the composition grow more beautiful — and that gradual unfolding is the true reward of bonsai practice.
Related Posts
Bonsai Root Over Rock: Complete Ishitsuki Guide
Cascade Bonsai Style: A Beginner's Complete Guide

Bonsai Grafting Techniques for Beginners
Bonsai Stem Cutting Propagation: High Success Guide
Air Layering Bonsai: Achieve a High Success Rate