Nebari Bonsai Technique: How to Develop Beautiful Surface Roots

InBonsai Team
April 15, 2026 · 9 min read
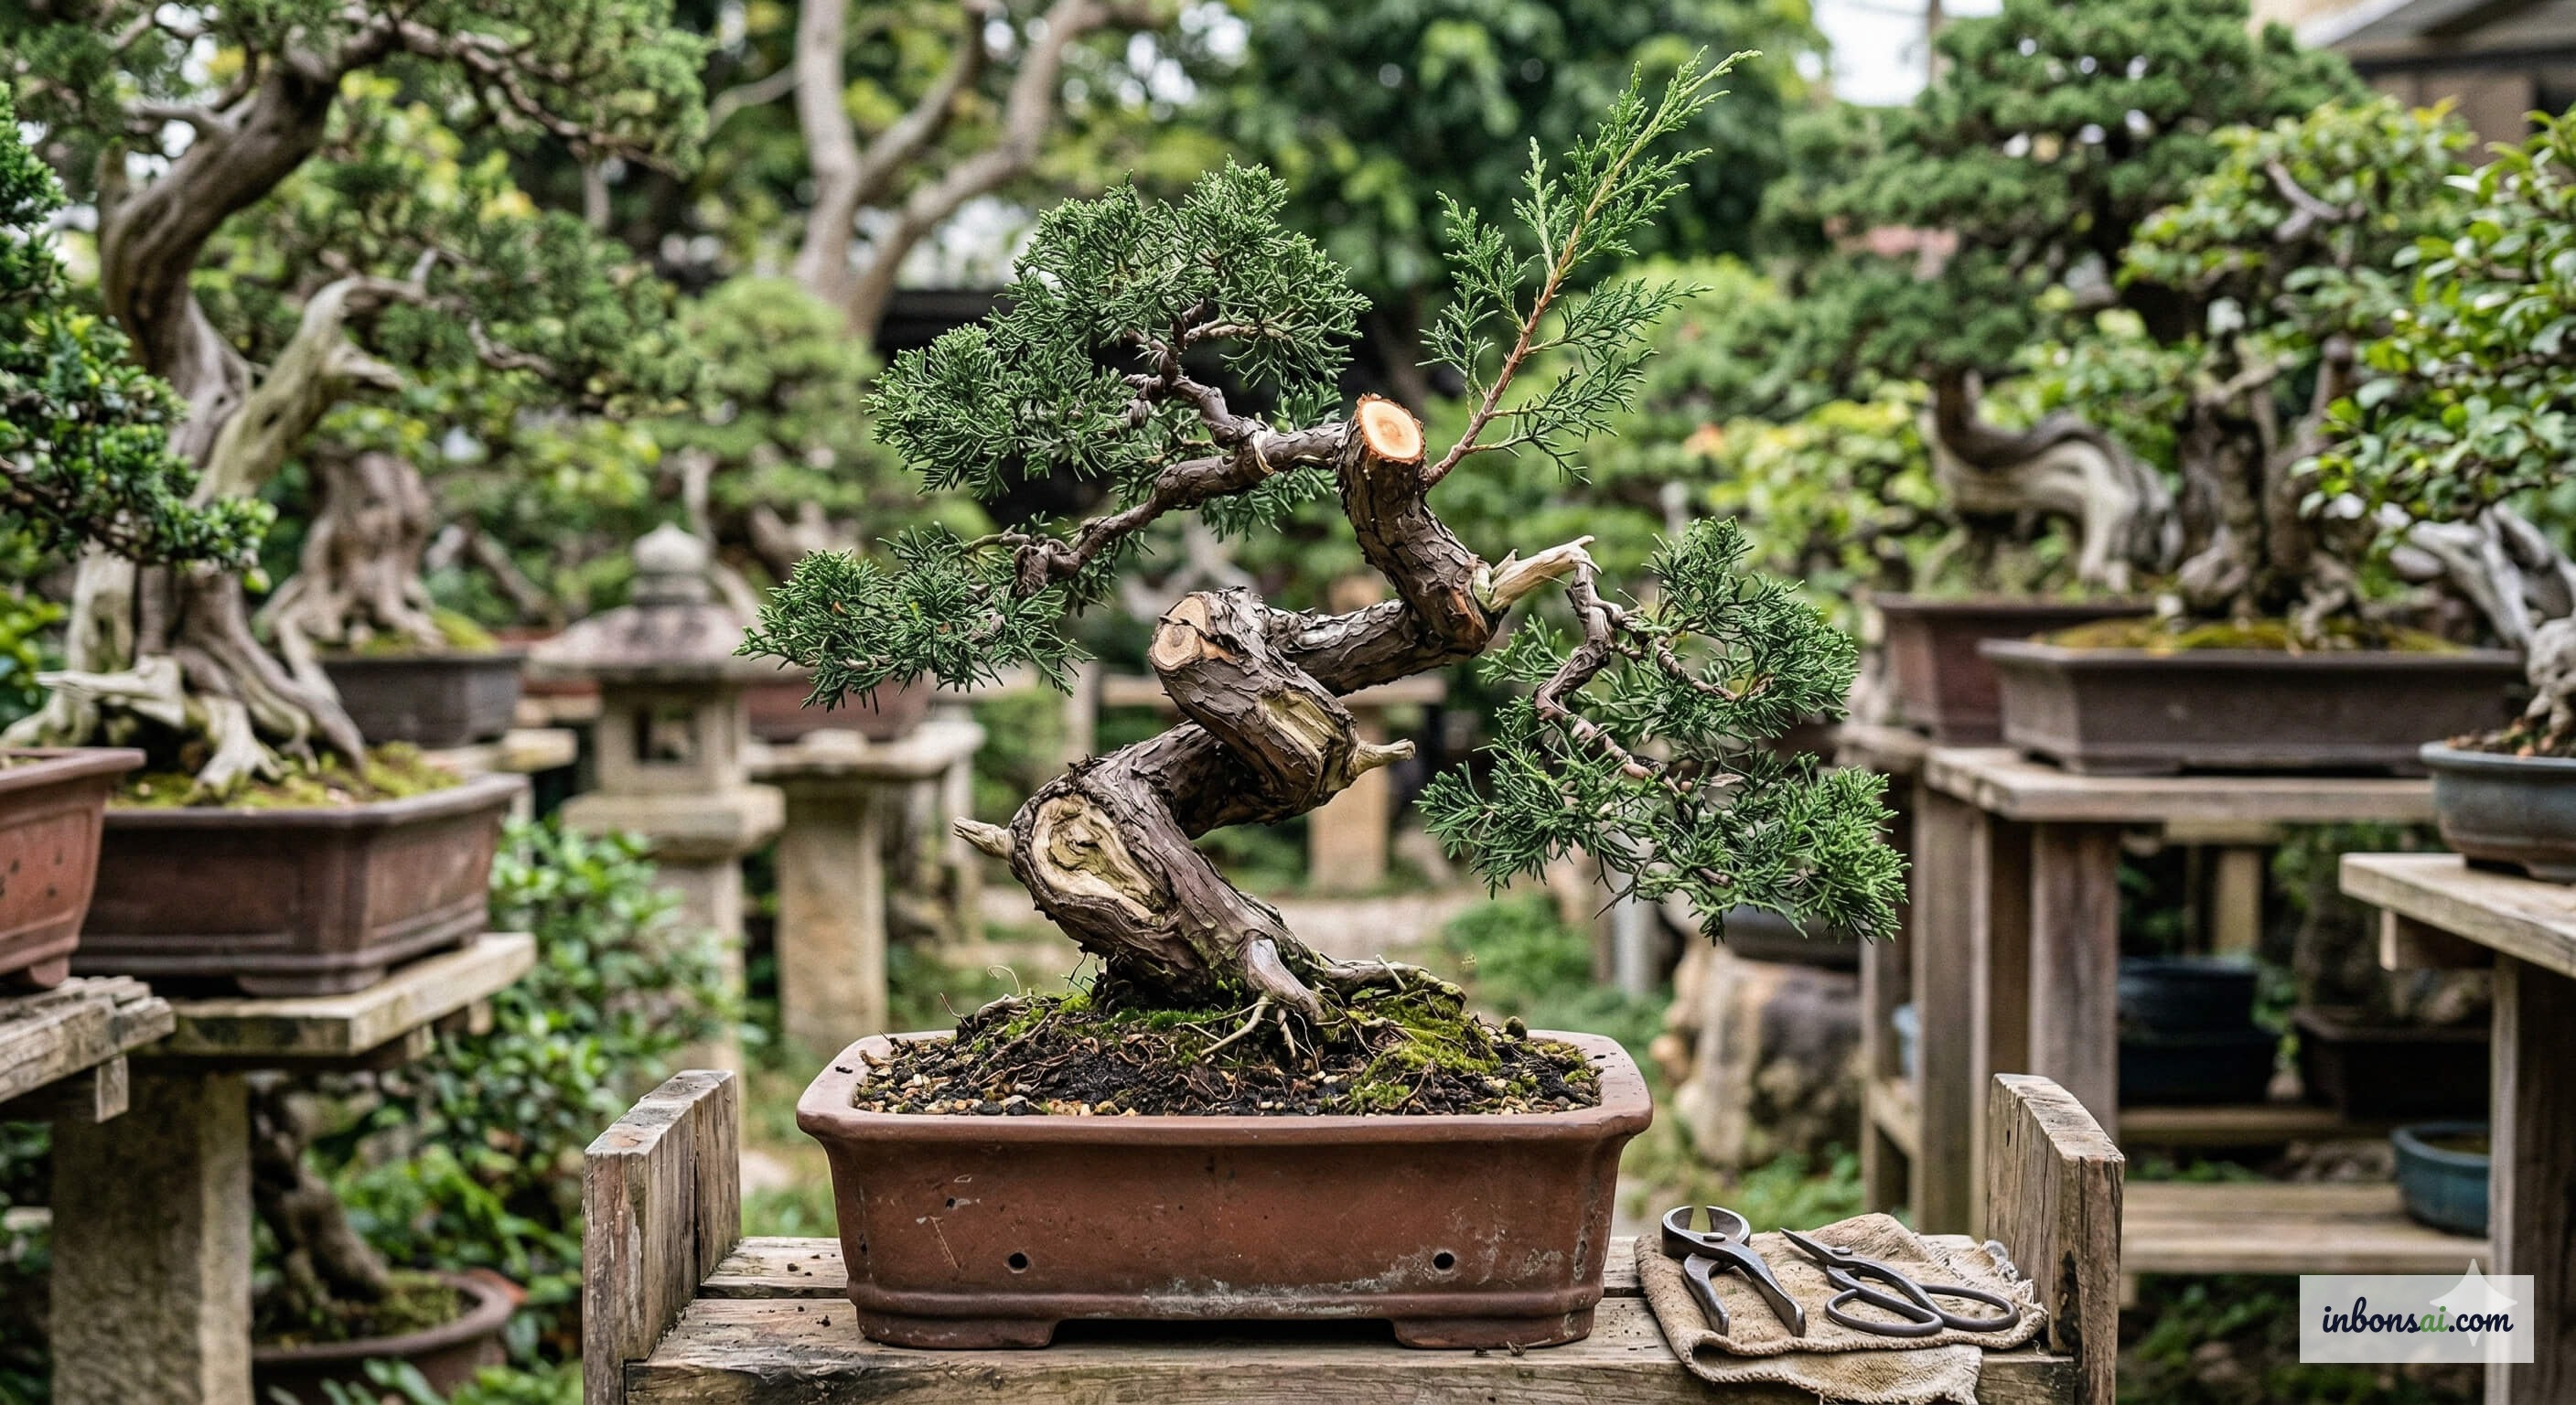
In the world of bonsai, nebari — or surface roots — is one of the most highly valued elements by artists and judges alike. A tree may have a beautiful trunk, well-balanced branches, and vibrant foliage, but without a healthy and symmetrical nebari it is considered incomplete. Developing beautiful nebari bonsai surface roots requires patience and an understanding of plant physiology, but the results are absolutely worth it — a wide-spreading base that grips the soil like the feet of a giant. This guide covers techniques from basic to advanced to help you build impressive nebari, from shallow tray repotting and selective root pruning to copper wire training.
What Is Nebari and Why It Is the “Face” of a Bonsai Tree
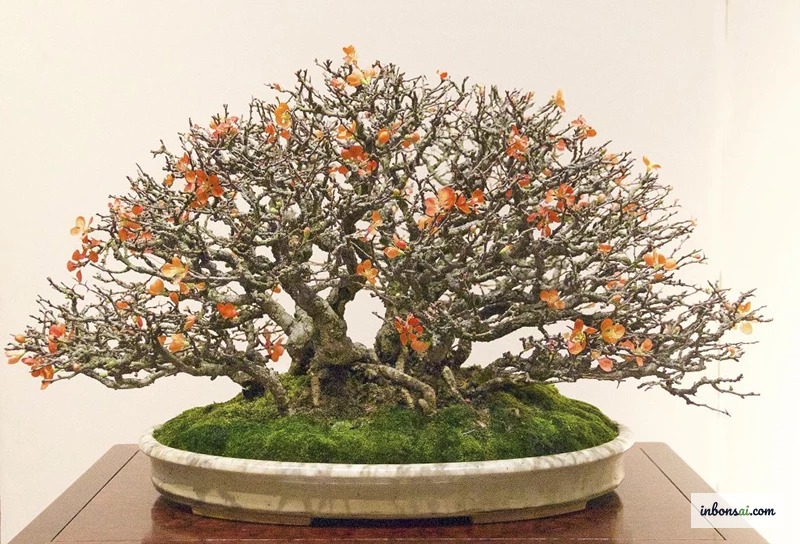
Nebari (根張り) is the Japanese term for the visible roots that radiate from the base of a bonsai tree at the soil surface. When viewing a bonsai composition, the eye naturally starts at the roots, travels up the trunk, and then out through the canopy. Nebari is not merely an aesthetic detail — it creates a sense of age, stability, and connection between the tree and the earth.
At Japanese and international bonsai exhibitions, a tree with perfect nebari consistently scores higher than one with an equally fine trunk and canopy but lacking visible roots. In the Lingnan bonsai style, a wide-spreading root base also symbolizes strength and endurance — the tree has clung to the earth through centuries of wind and storm.
What makes nebari especially compelling is that it is not a fixed trait. Even young trees without visible roots can develop beautiful nebari if the right techniques are applied consistently over many years. This is precisely what makes root training one of the most intellectually rewarding challenges — and the most demanding in terms of long-term vision — in the art of bonsai.
Characteristics of a Perfect Nebari
Not every exposed root qualifies as good nebari. Experienced bonsai artists apply clear criteria when evaluating root quality:
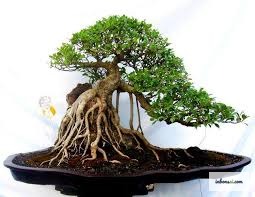
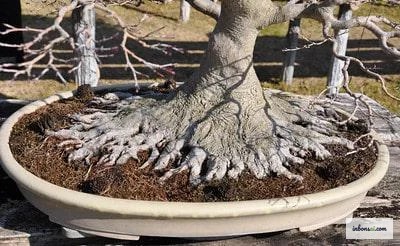
Radial symmetry: Roots radiate evenly in all directions from the base, with no direction lacking or overly dominant. Viewed from above, the roots form a balanced star pattern with pleasing visual weight.
Roots hug the soil surface: Visible roots must contact the ground before descending, creating a visual “anchoring” effect. Roots that lift away from the soil or curve backward lose significant aesthetic points.
Tapered thickness from base outward: Roots near the trunk must be thicker, tapering as they extend outward — mirroring the natural taper of branches. This transition creates a feeling of harmony and organic flow.
No crossing roots: Roots that cross or intertwine create visual clutter and compete for space. Each root should have its own “territory” as it radiates from the base.
Textured root surface: Mature roots develop bark and a naturally weathered texture — a sign of true age. Smooth, juvenile roots lack the visual impact of seasoned ones.
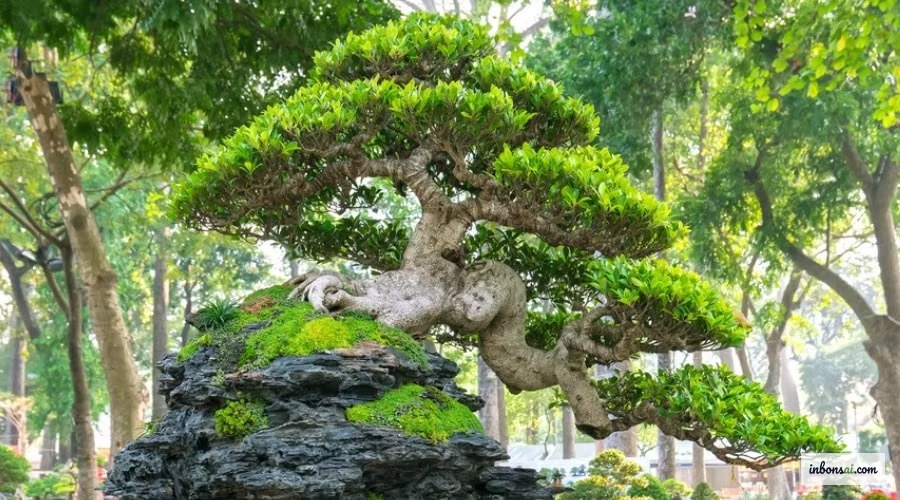
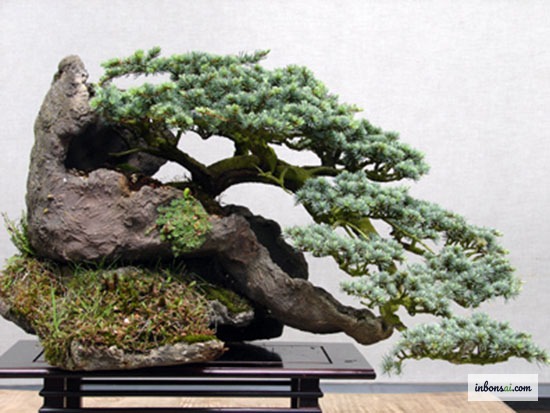
Furthermore, beautiful nebari must suit the overall tree style. Cascade (kengai) trees can accept asymmetric roots, while formal upright (chokkan) trees demand full radial symmetry.
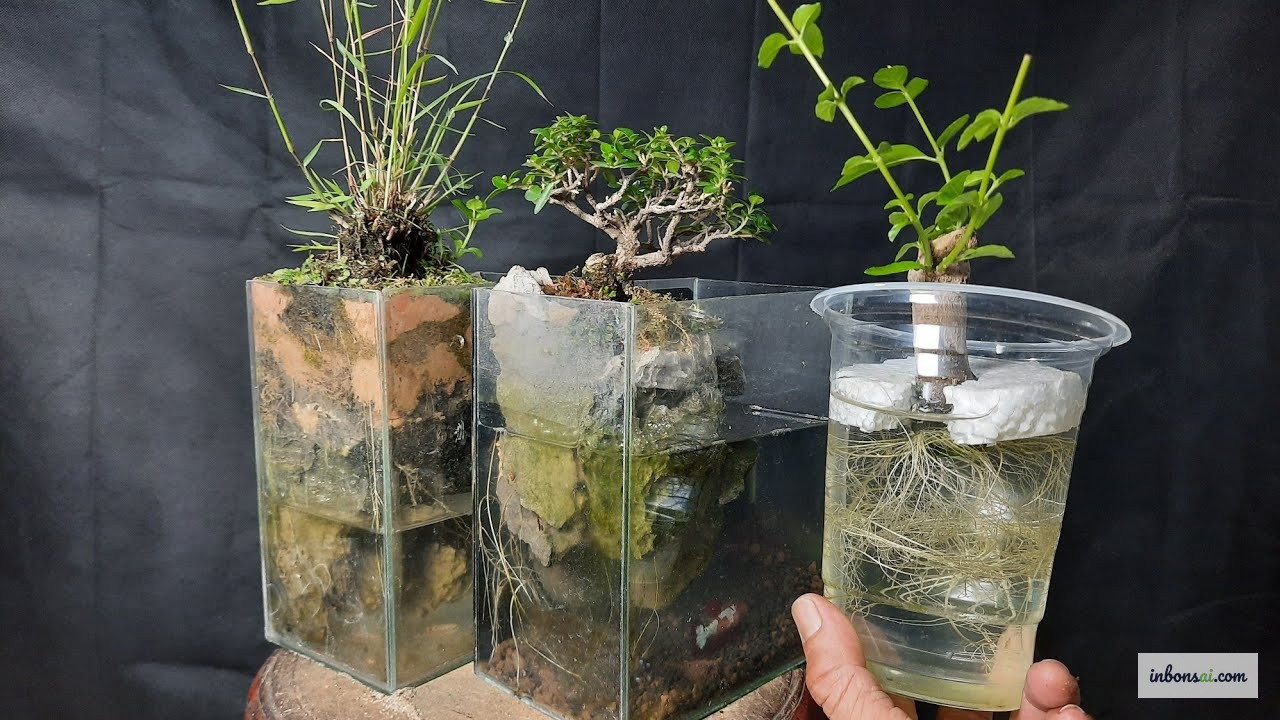
The Shallow Tray Technique — The Foundation of Every Nebari
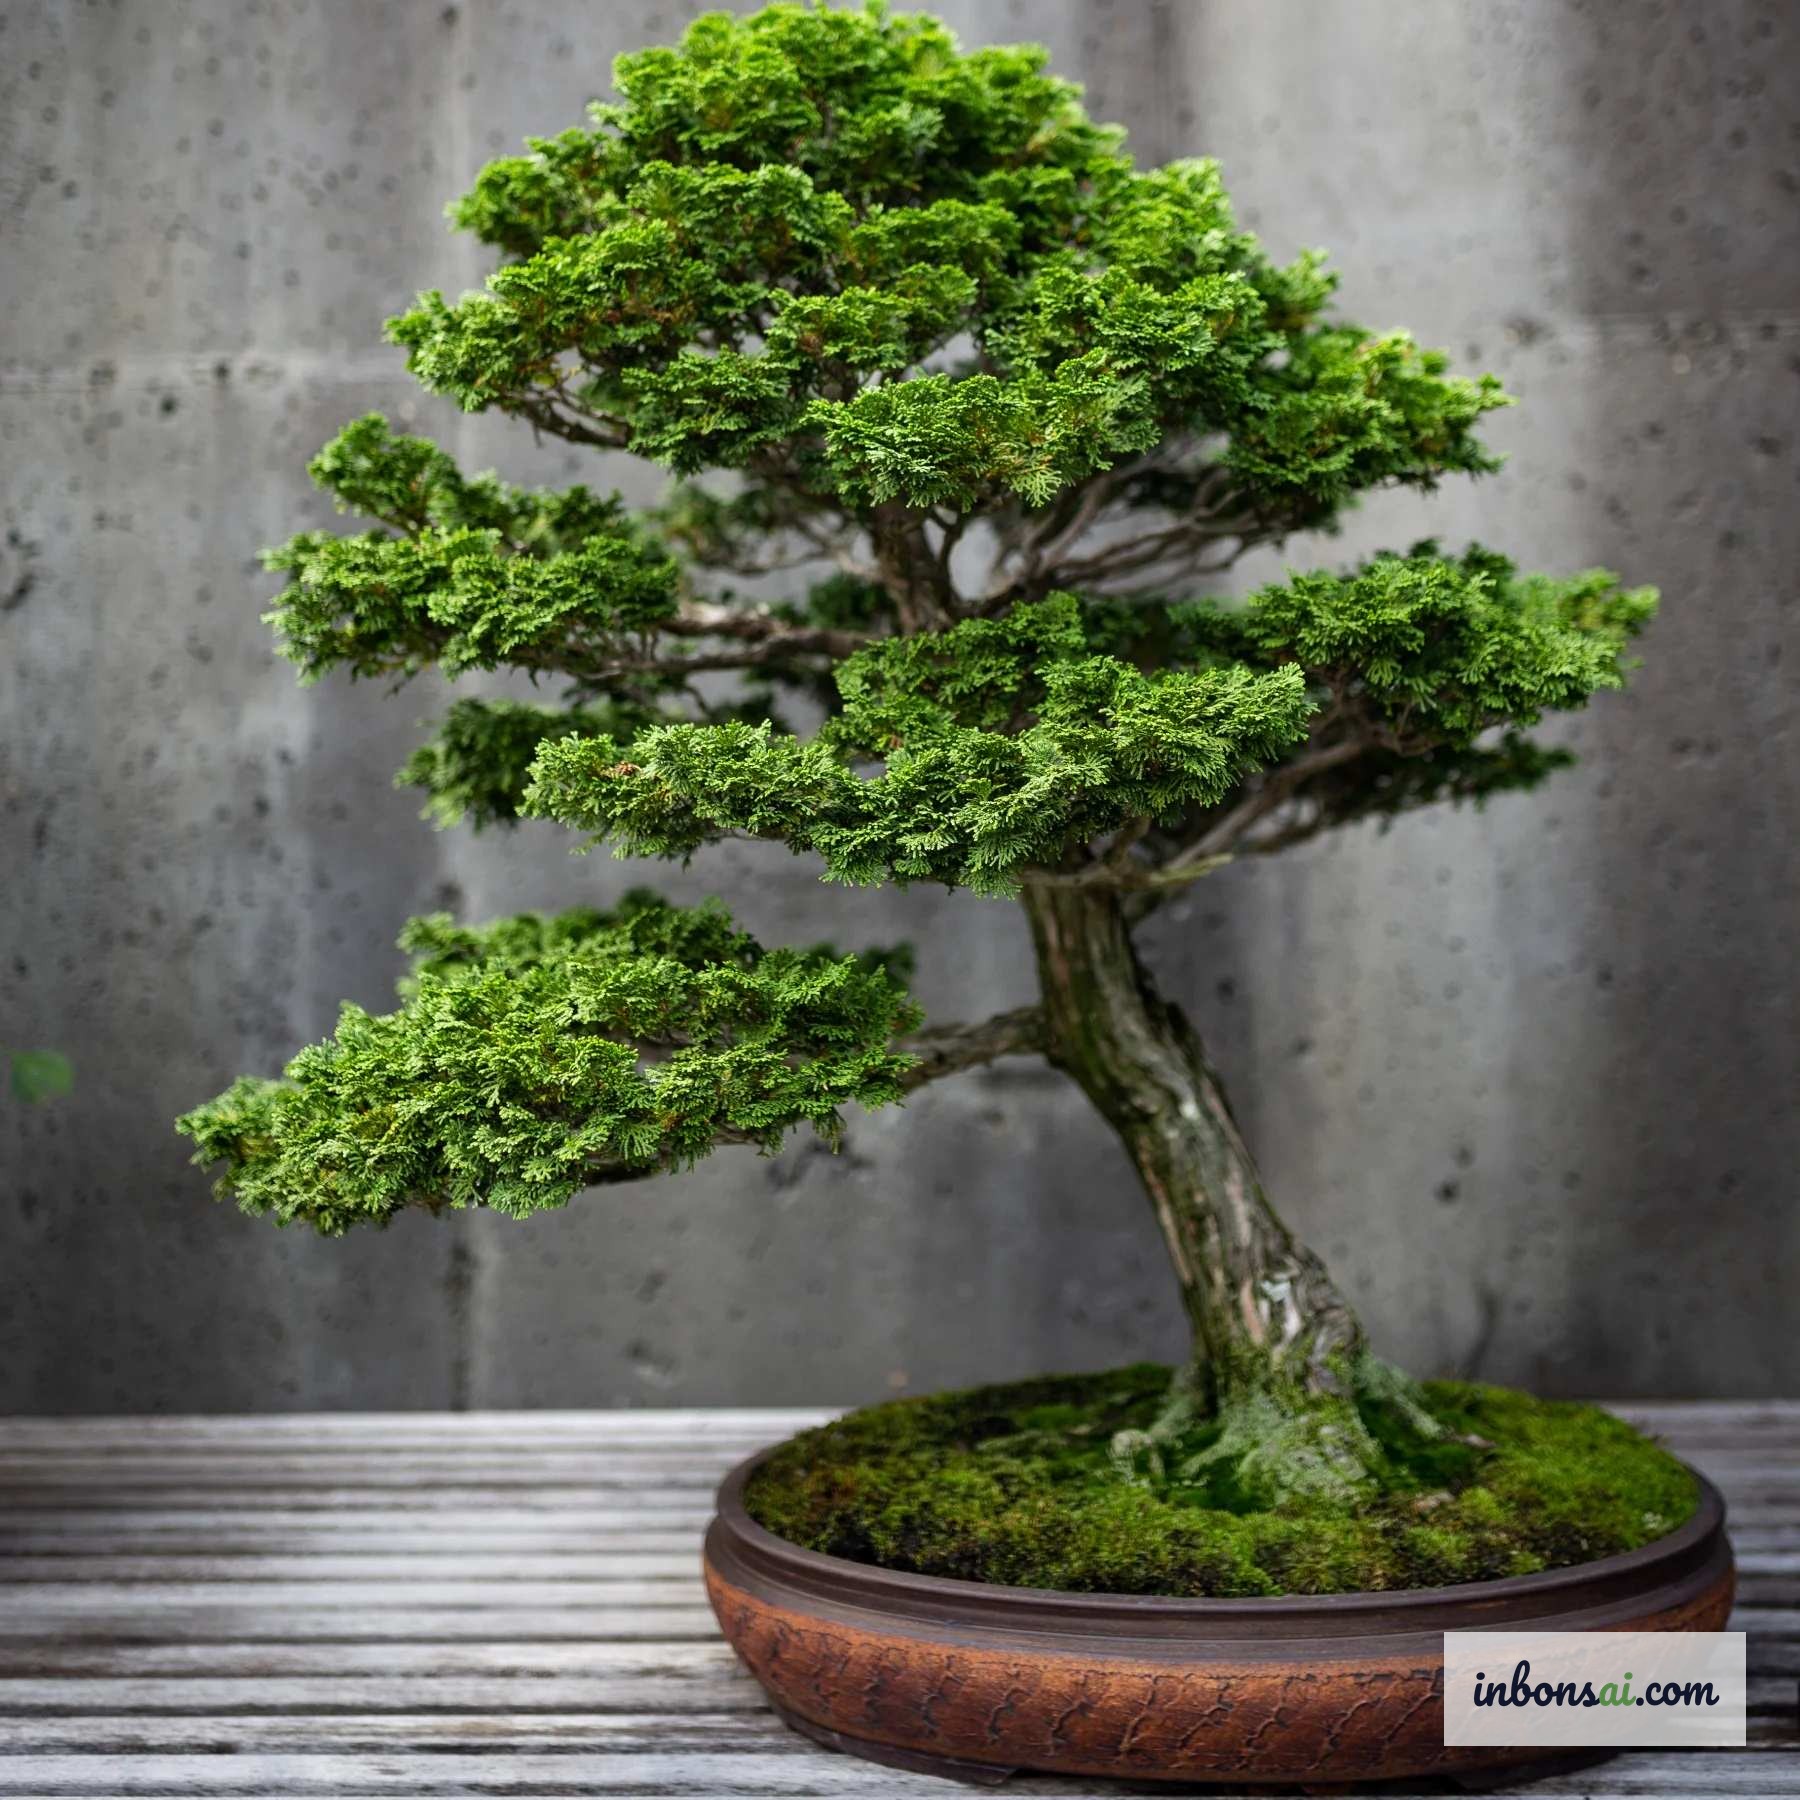
This is the most fundamental and effective technique to begin nebari development. The principle is simple: when a tree grows in a shallow dish or flat tray, roots have no room to grow downward and are forced to spread horizontally.
Step 1 — Choose the right timing: Repot at the start of spring when the tree has just begun pushing new buds. Roots are in their most active growth phase and recover quickly. See how to repot bonsai correctly step by step for the full process.
Step 2 — Prepare the shallow container: Choose a tray or pot no deeper than 5–7 cm relative to the base diameter. The ideal ratio is a pot depth equal to roughly one-third to one-half the base diameter. A shallower tray produces faster lateral spreading but requires more frequent watering.
Step 3 — Separate and spread roots: After removing the tree, use a bamboo chopstick or soft brush to work the old soil away from the roots. Gently spread roots horizontally, removing any downward tap roots that do not contribute to surface nebari.
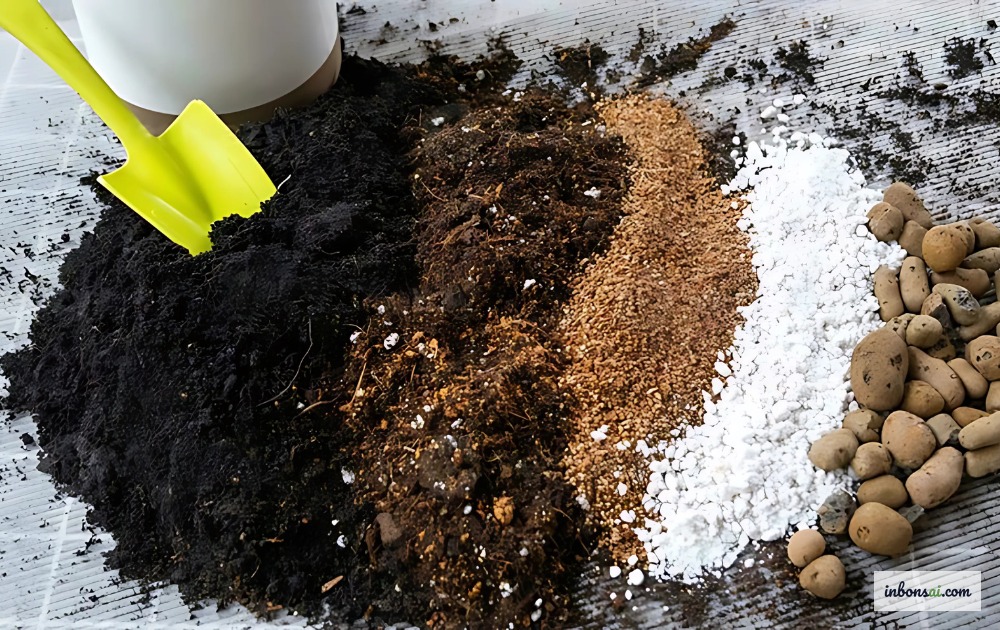
Step 4 — Repot with a well-draining mix: Use a fast-draining substrate to promote healthy root development. Refer to bonsai soil ratios: akadama, pumice, and perlite to select the right formula for your species.
Step 5 — Anchor the tree: Thread tie-down wire through the drainage holes to keep the tree stable while new roots establish. An unstable tree prevents new feeder roots from anchoring and greatly slows recovery.
After repotting, place the tree in partial shade for 2–3 weeks before returning to full sun exposure.
Selective Root Pruning — Directing Growth with Intention
Root pruning is a powerful tool for shaping nebari, but it must be executed with clear intent rather than at random. Every cut stimulates branching at that point, creating multiple smaller feeder roots — just as pinching a branch tip triggers new buds to emerge.
Roots to prioritize removing:
- Tap roots: Roots that grow straight down into the soil and do not contribute to visible nebari. These are the top pruning priority at every repotting.
- Upward-growing roots: Roots that lift into the air rather than hugging the soil surface.
- Crossing roots: Roots that intersect with others, causing visual clutter.
- Long, unbranched roots: Roots that extend far outward without sub-branches near the base, thinning the nebari’s visual density.
Safe pruning principles: Cut cleanly and decisively with sharp, sterilized scissors. A clean cut heals faster than a rough one. Critically, never remove more than one-third of the total root mass in a single repotting session — doing so risks severe shock and decline.
Approach every repotting as an opportunity for gradual improvement rather than total transformation in one session. Patience and consistency over many years will always outperform aggressive single interventions.
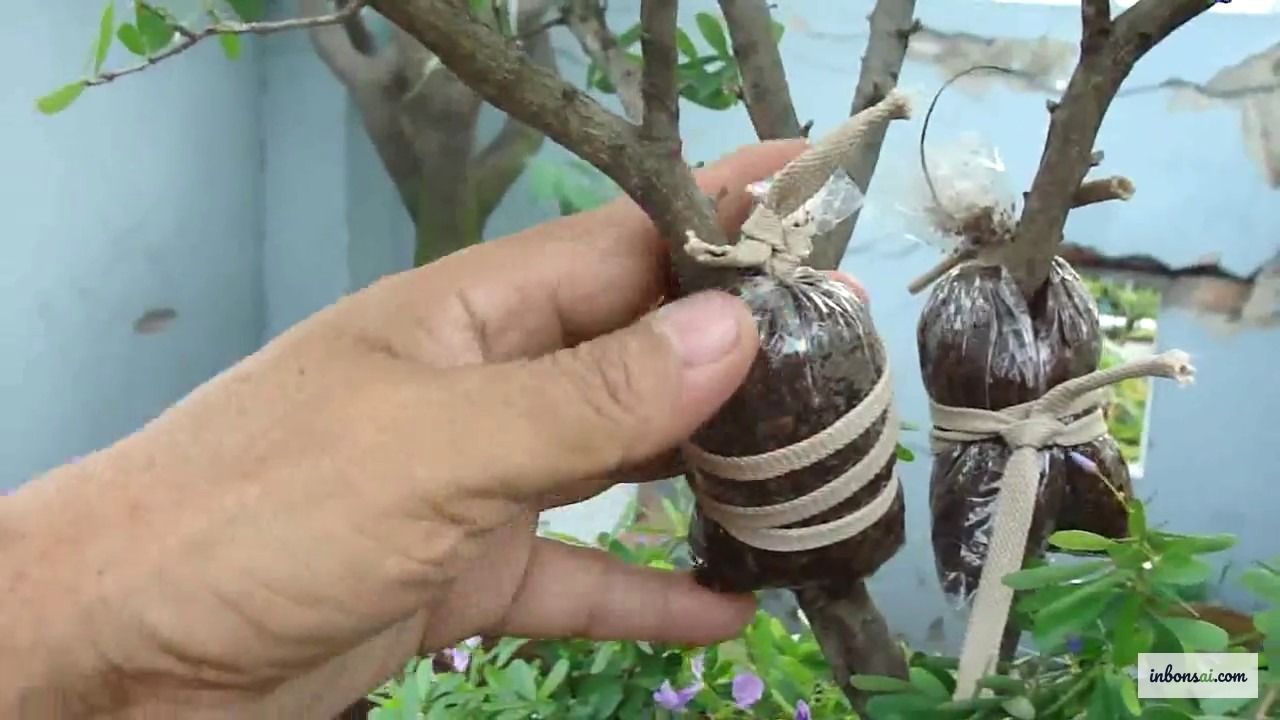
Copper Wire and Tourniquet Methods — Advanced Nebari Techniques
Beyond pruning and repotting, bonsai artists use mechanical methods to direct surface root development. The two most common are copper wire training and the tourniquet (ga-rô) technique.
Copper wire for root positioning: Similar to wiring branches, this technique uses soft wire to hold roots in the desired position — typically flat against the soil surface. Wrap thin copper wire (1–2 mm) around the root from base outward and gently bend it to contact the soil. Remove the wire after 6–12 months depending on growth rate; never allow wire to cut into the root tissue.
Tourniquet for nutrient accumulation: Tie a length of copper or plastic wire moderately tight around the trunk base, approximately 0.5–1 cm above the soil surface. The constriction slows the downward flow of sap, causing nutrients to accumulate above the tie point — stimulating new roots to emerge just below it. This technique works best during the vigorous growing season of spring and early summer.
Safety cautions: Never apply the tourniquet too tightly, as this can kill tissue above the point. Check and loosen every 2–3 months. If bark swelling or discoloration appears above the tie, remove it immediately.
Additionally, the tourniquet technique can be combined with light bark scoring at the target emergence point — particularly effective on species with thin bark such as Ficus microcarpa, Ficus religiosa, and banyan trees.
Ideal Substrate and Conditions for Nebari Development
Substrate plays an equally important role as mechanical technique. Roots only surface when environmental conditions truly favor that behavior.
Optimal substrate for nebari: A fast-draining mix with akadama at 40–50%, pumice at 30%, and light loam or kiryu at 20–30%. Moisture-retentive soil drives roots deeper in search of oxygen; well-draining substrate keeps roots near the surface where air is abundant. See bonsai soil ratios: akadama, pumice, and perlite for precise formulas.
Adequate sunlight: Trees receiving 6–8 hours of direct light daily photosynthesize more efficiently, supporting vigorous root growth and branching. Light-starved trees produce weak, sparsely branched roots that rarely develop into impressive nebari.
Proper watering cycle: Water thoroughly, then allow partial drying before watering again — never misting a little each day. The wet-dry cycle encourages roots to actively seek water, which strengthens them and promotes expansion.
Seasonal fertilizing: Apply balanced NPK fertilizer during the growing season (spring and summer), then shift to a low-nitrogen, high-phosphorus-potassium formula in late season to channel energy into root development rather than foliage. Phosphorus (P) is especially important for root health and expansion.
Temperature and airflow: Roots develop best when soil temperature ranges from 18–28°C. Avoid placing pots on hot concrete in summer — use wooden benches or stands to keep root-zone temperatures stable.
A Year-by-Year Nebari Development Roadmap
Developing beautiful nebari is a long journey — not a single-season project. Consider this realistic timeline to calibrate expectations and stay motivated.
Years 1–2 (Foundation phase): Focus on moving the tree to a shallow tray, removing tap roots, and eliminating unhelpful roots. The goal is establishing the basic root structure and radial direction. Nebari may not look impressive yet, but the directional work being done now determines everything that follows.
Years 3–5 (Shaping phase): Continue selective root pruning at each repotting (every 2–3 years for mature trees). Begin applying copper wire to position specific roots. The nebari now starts to spread visibly and take on a recognizable structure that creates a real impression.
Years 5–10 (Maturity phase): Nebari is maturing. Roots have gained thickness, radiate evenly, and stand clearly above the soil surface. This is a maintenance phase — preserving the structure built over many years rather than disrupting it.
Critical reminder: Each species has a different root development speed. Ficus religiosa, Ficus microcarpa, and banyan trees develop roots quickly and achieve impressive nebari relatively fast; pines, junipers, and conifers develop far more slowly. Adjusting your timeline and expectations to each species’ characteristics is fundamental to success. For insights into how Lingnan school masters approach the nebari challenge over decades, see Lingnan bonsai root training methods.
Beautiful nebari does not appear by chance — it is the result of patience, understanding of plant physiology, and the consistent application of correct technique over many years. Start with the simplest step: move your tree to a shallow tray this coming spring, remove the tap roots, and let nature do the rest. With time and attention, your tree’s base will slowly spread wide like hands gripping the earth — the mark of a truly mature and accomplished bonsai composition.
Related Posts
Nebari Bonsai Technique: How to Develop Beautiful Surface Roots
Bonsai Root Over Rock: Complete Ishitsuki Guide
Cascade Bonsai Style: A Beginner's Complete Guide

Bonsai Grafting Techniques for Beginners
Bonsai Stem Cutting Propagation: High Success Guide
Air Layering Bonsai: Achieve a High Success Rate

Lingnan Bonsai Grow-and-Cut Technique: A Complete Guide